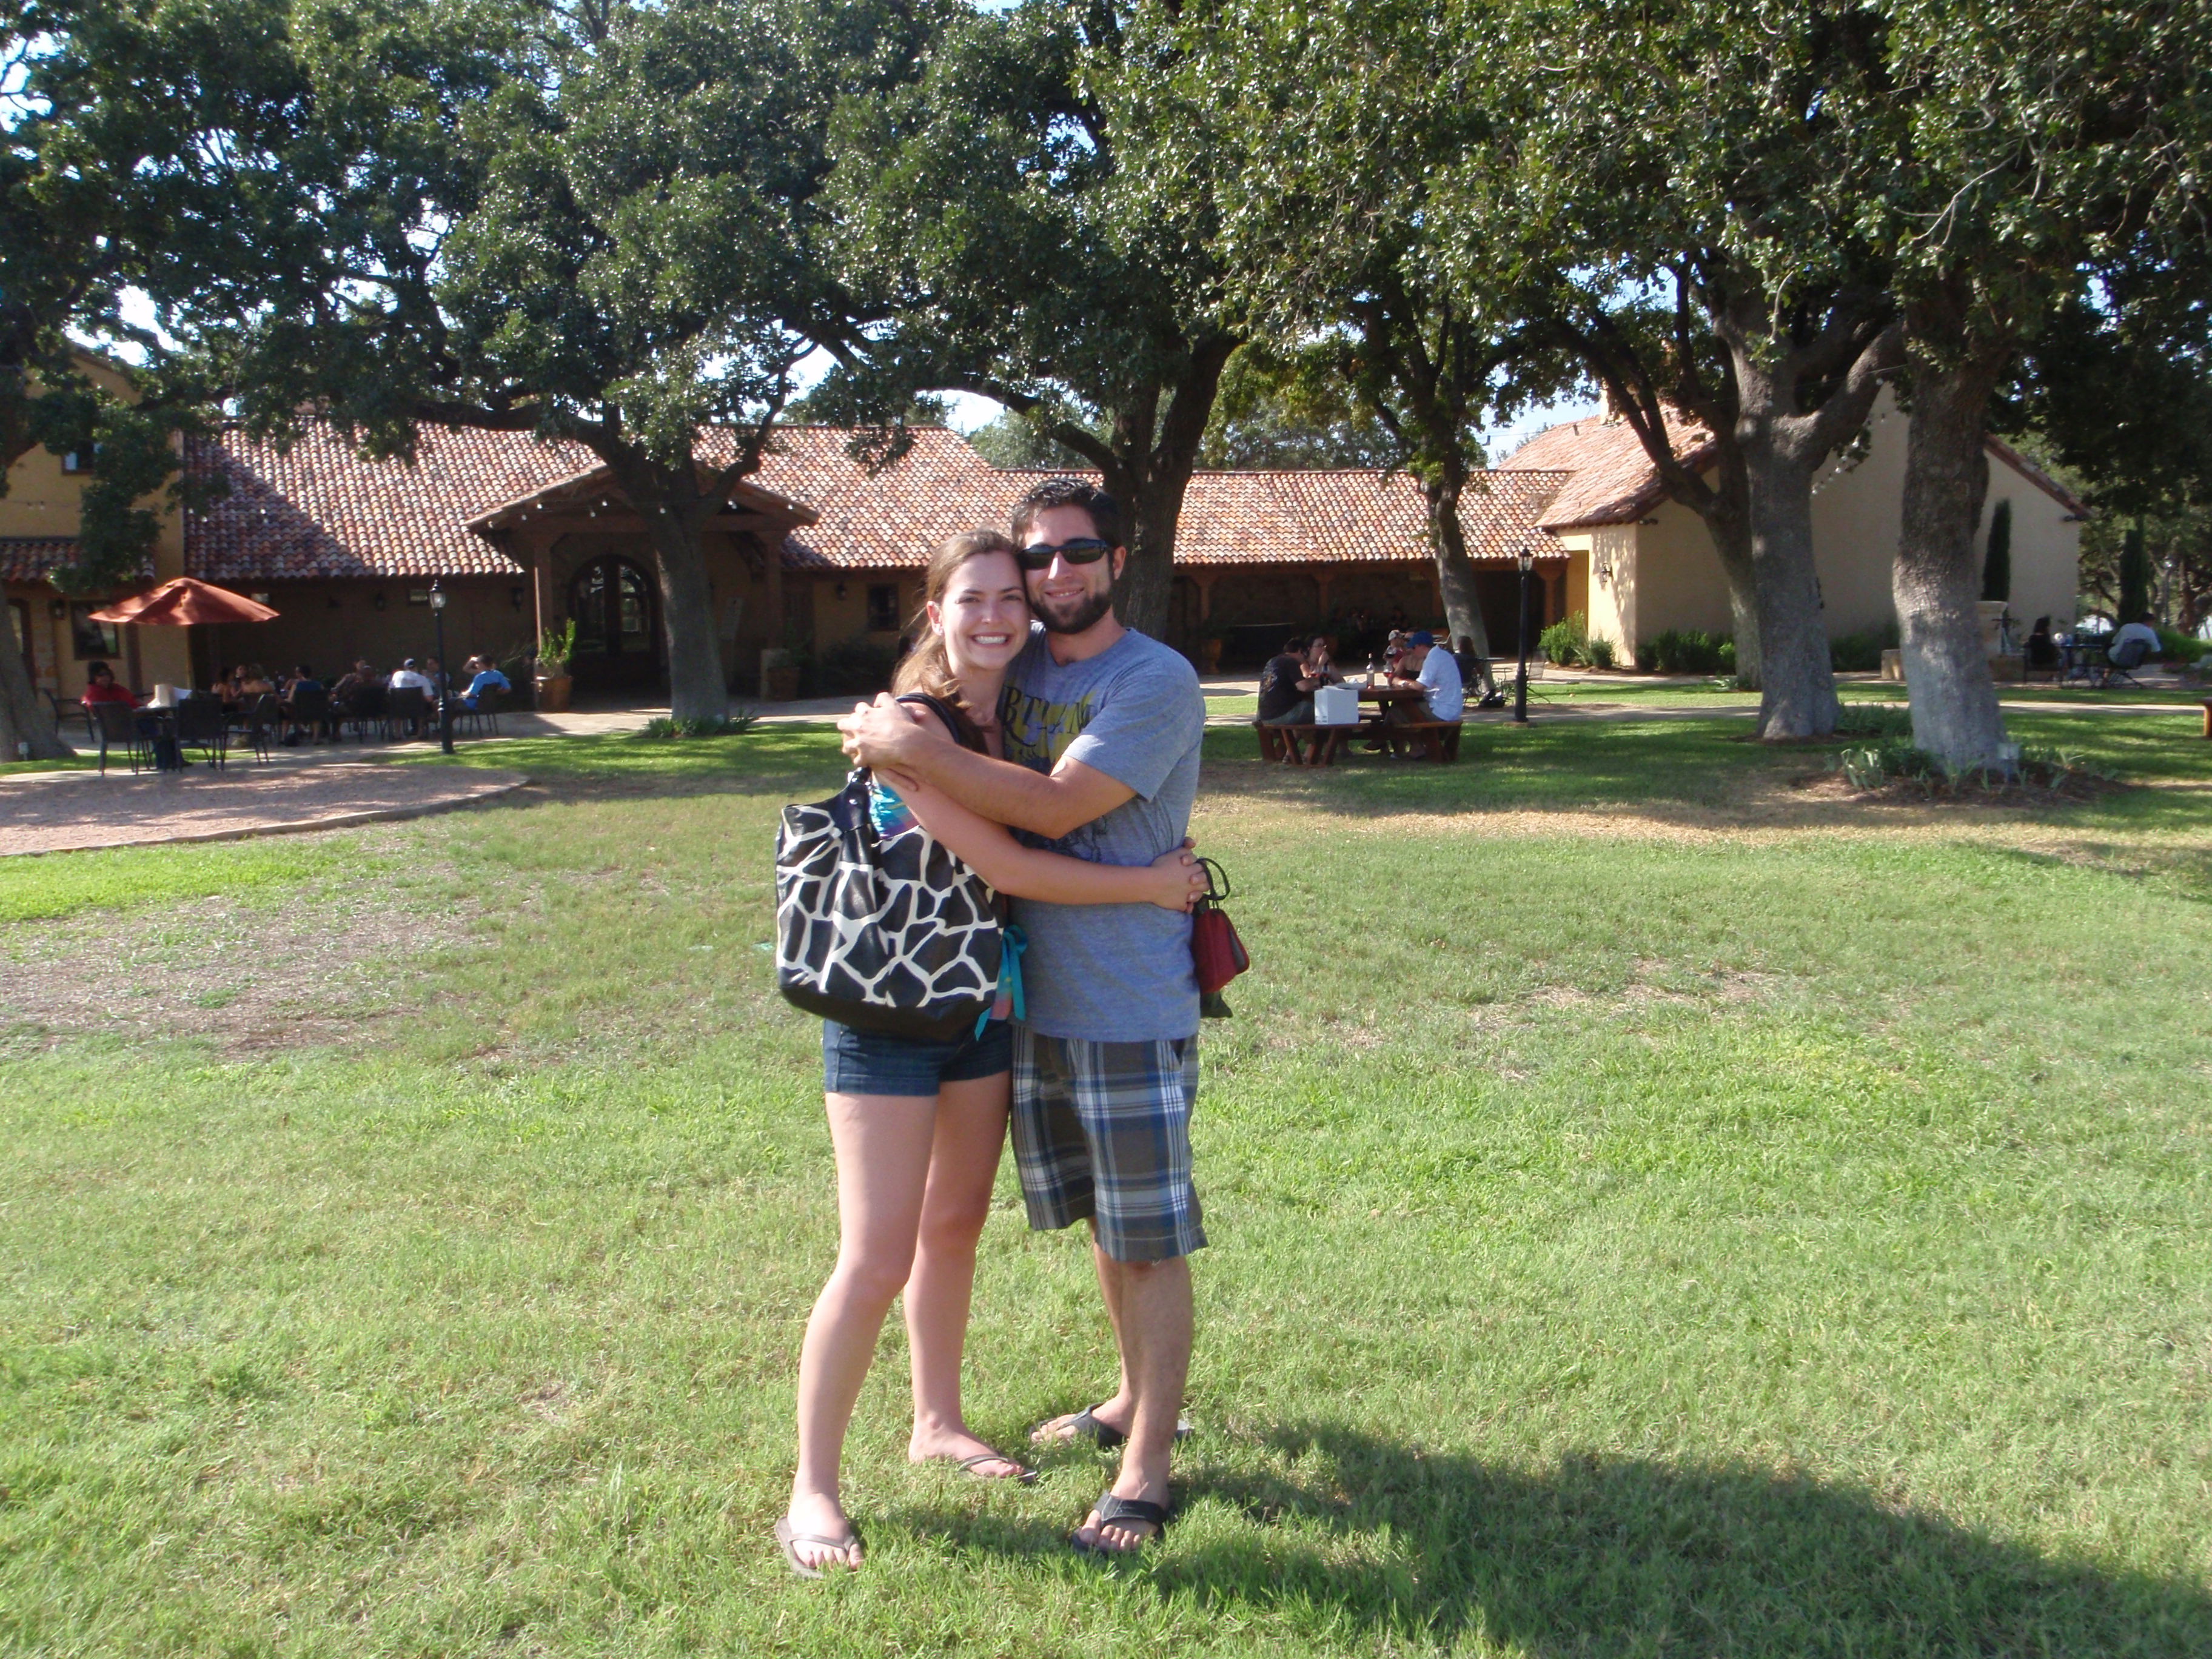
• Home
  • Contact
  • Blog
  • Categories
    • Baking
    • Celebration
    • Design
    • DIY
    • Travel
  • Disclaimer
    • Instagram

Welcome

Ireland Part 1

August 9, 2019

Ireland Part 1

Our Ireland trip began by me having no idea where we should vacation for the following year and googling good vacations with kids and Ireland came up. So, on a whim I thought I’d see what ticket prices would cost and found tickets for 600$ round trip! I’ve paid close to that to go to California so Ireland it was!

I am a big time planner and love researching all the things to do and see and roads to travel by and just 2 weeks after booking the trip I had our entire itinerary planned. Here’s what we did and the AMAZING food we ate!

Day 1

We landed at about 1030am and I wanted everyone to be able to transition to the new time zone as quickly as possible so we rented our van and got on the road to Kilkenny. It was about a 1.5 hour drive from Dublin and thankfully all highway. As I’m sure you can imagine my husband was super thrilled about being on a plane for 8+hrs and then having to drive 1.5 hours to our first stop…he loves me.

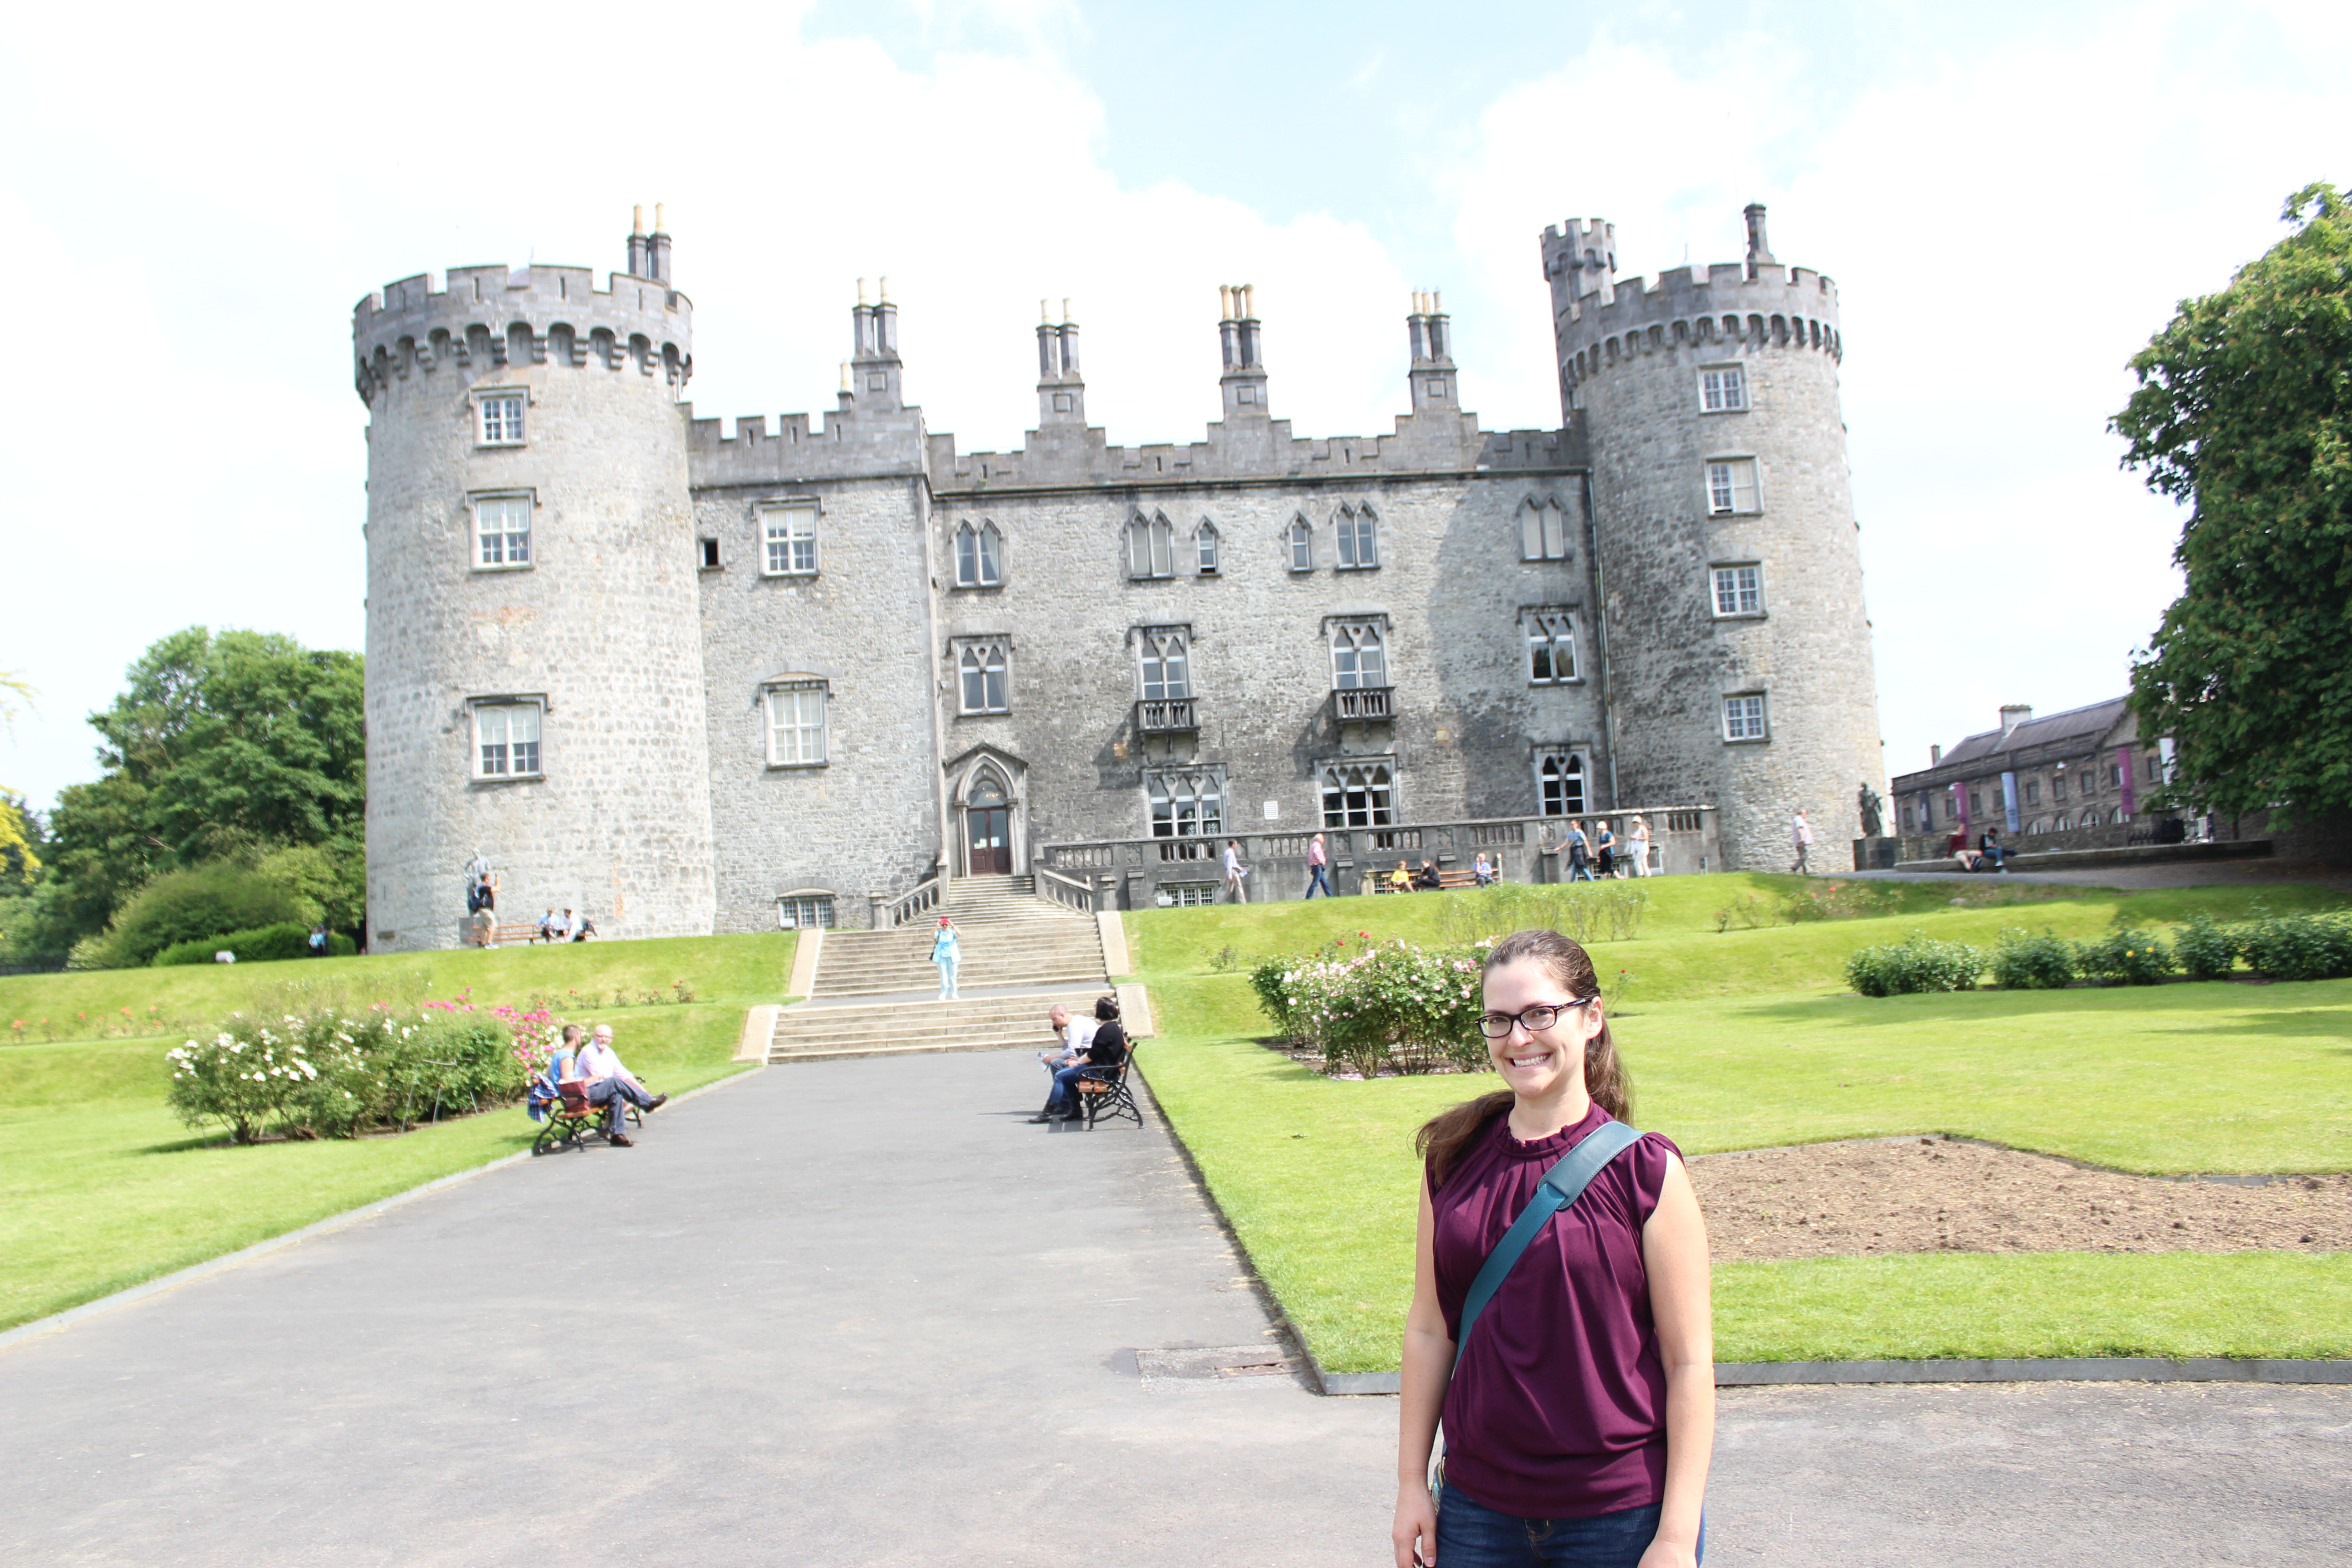
We arrived in Kilkenny and only had a few hours of day light so we checked into our hotel, which is walking distance to town and then went to Kilkenny castle.  We did a self guided tour followed by a walk through the beautiful gardens on their property and topped it off with dessert from the ice cream stand on the grounds. There are some shops across the street that sell a variety of items actually made in Ireland, so if you want to get some souvenir shopping done early it’s the perfect place to go.

IMG_1461IMG_1489IMG_1491IMG_1505

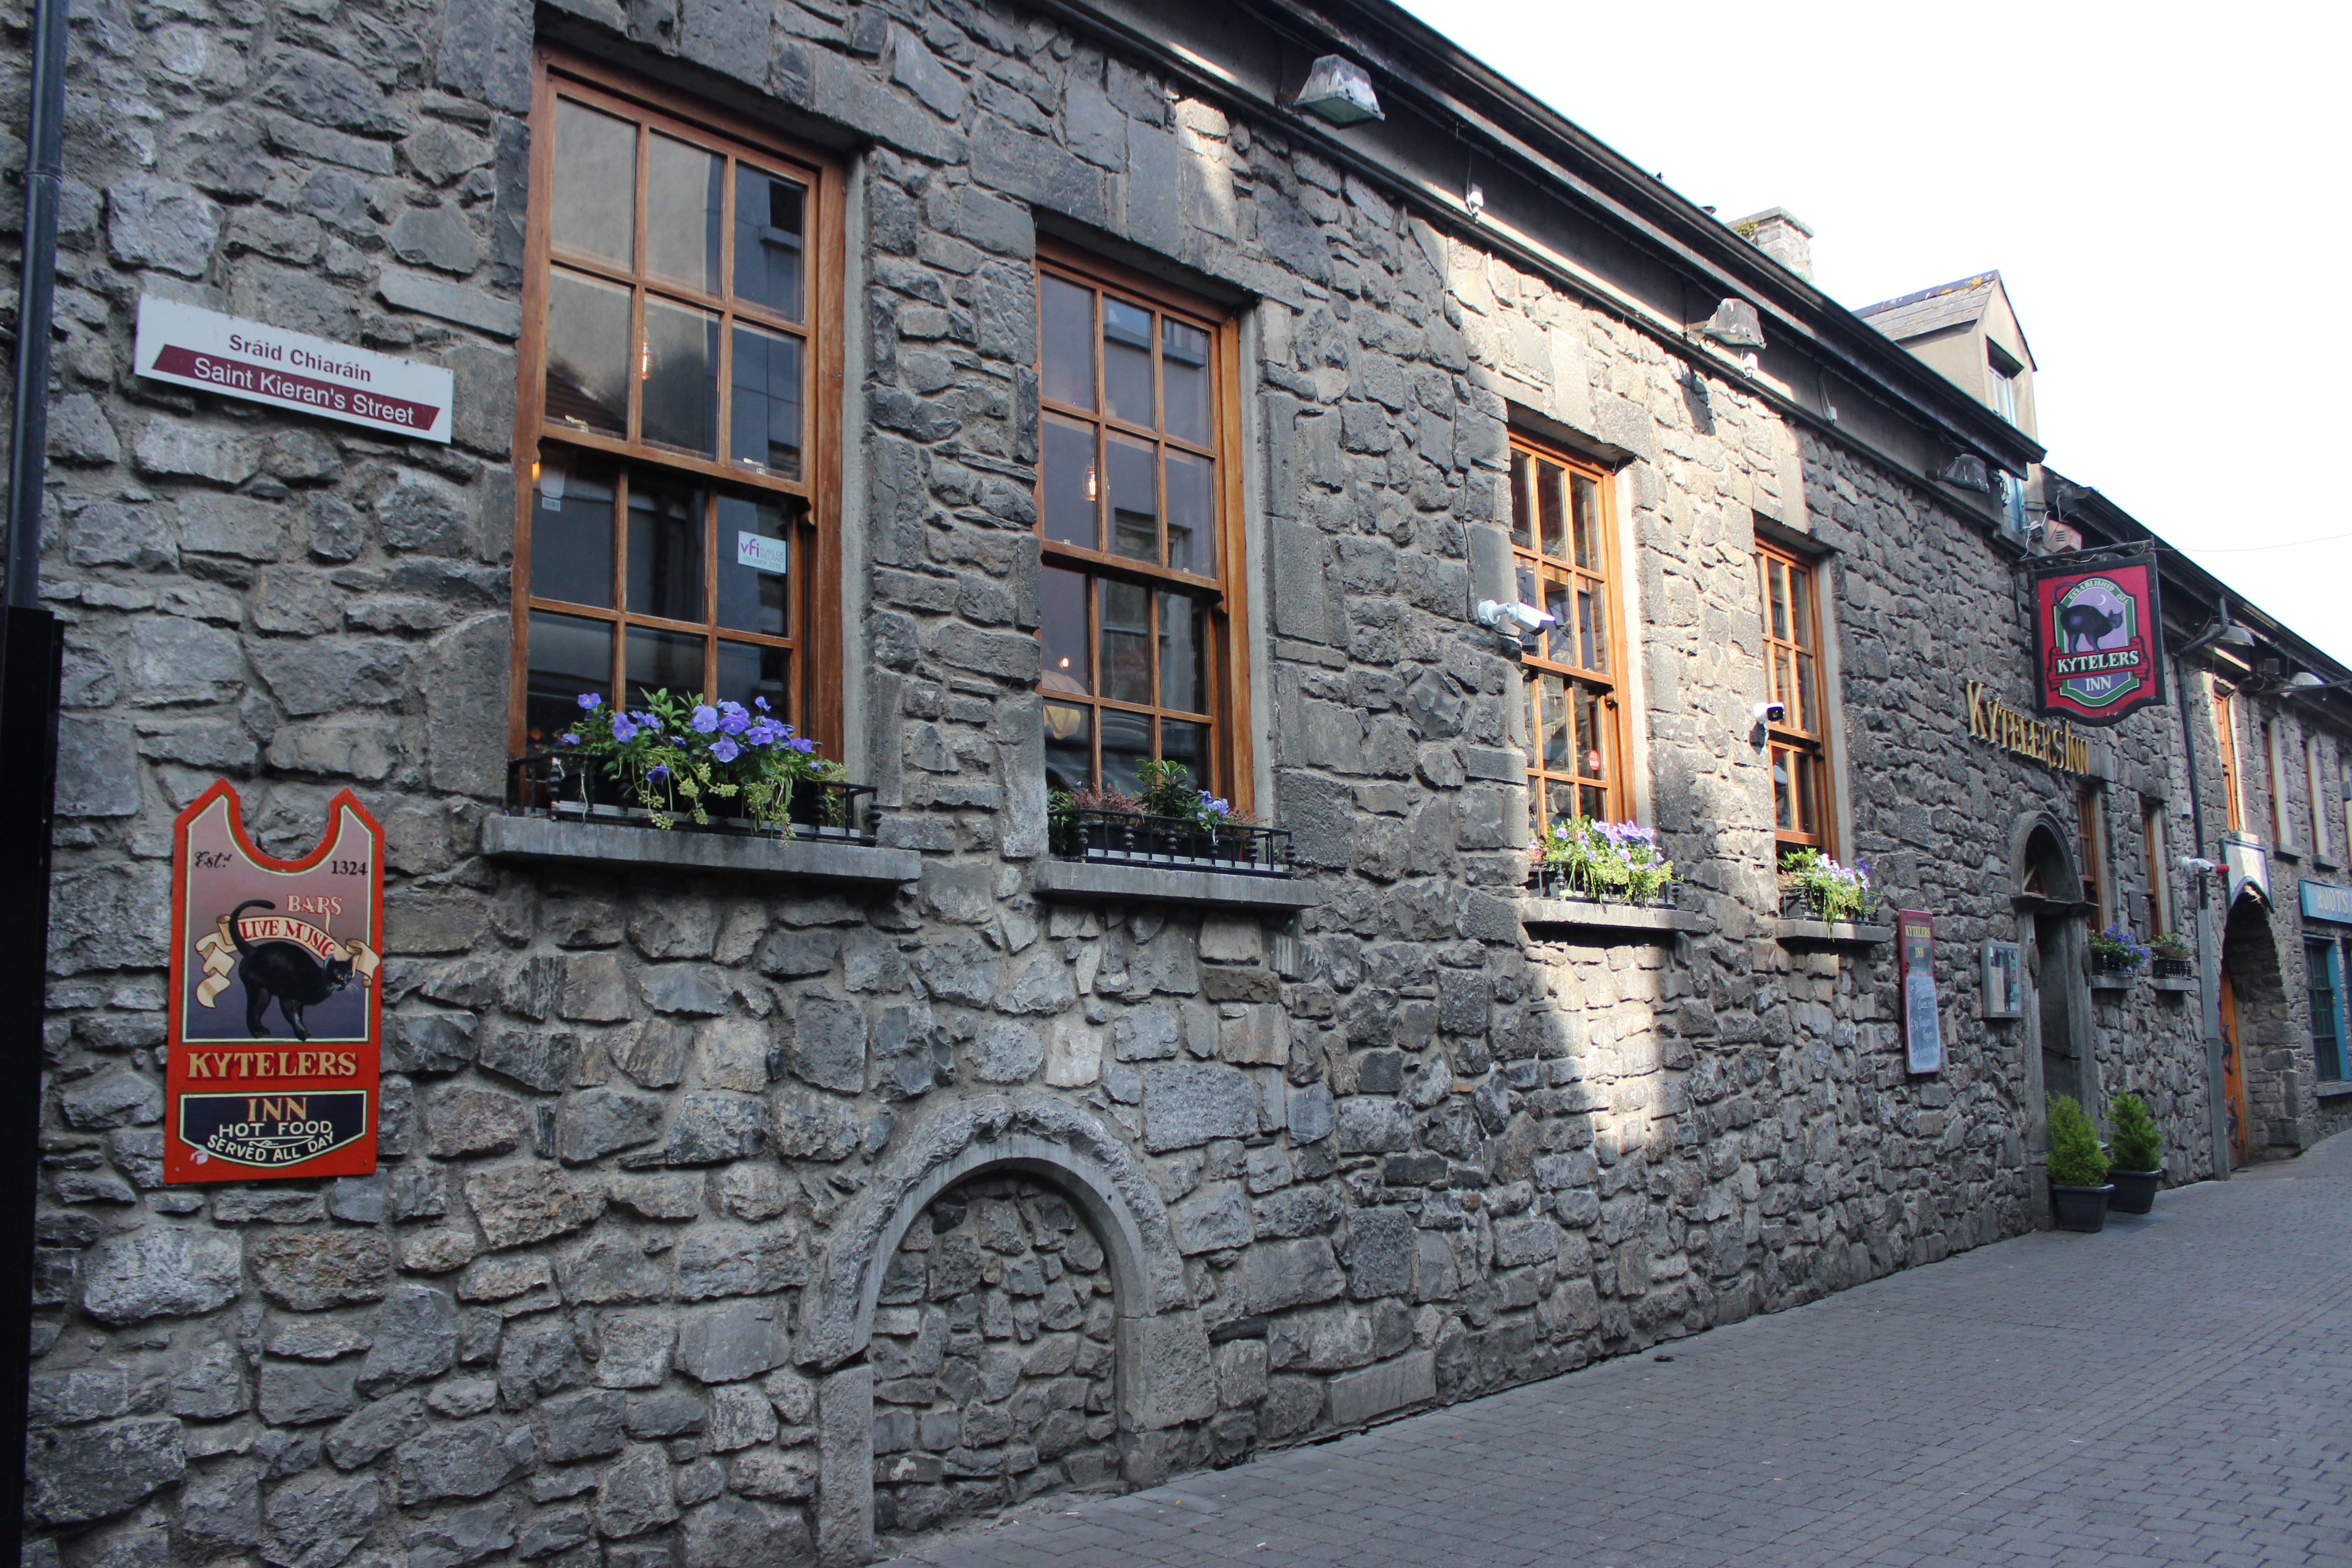
For dinner we ate at Kytelers Inn, which is walking distance from the castle. And we enjoyed our first Irish dinner of lamb stew and bangers and mash while listening to a guy play a Bodhran. The food was delicious and what better way to start your first day than eating in a building that’s been there for over 800 years!

Day 2

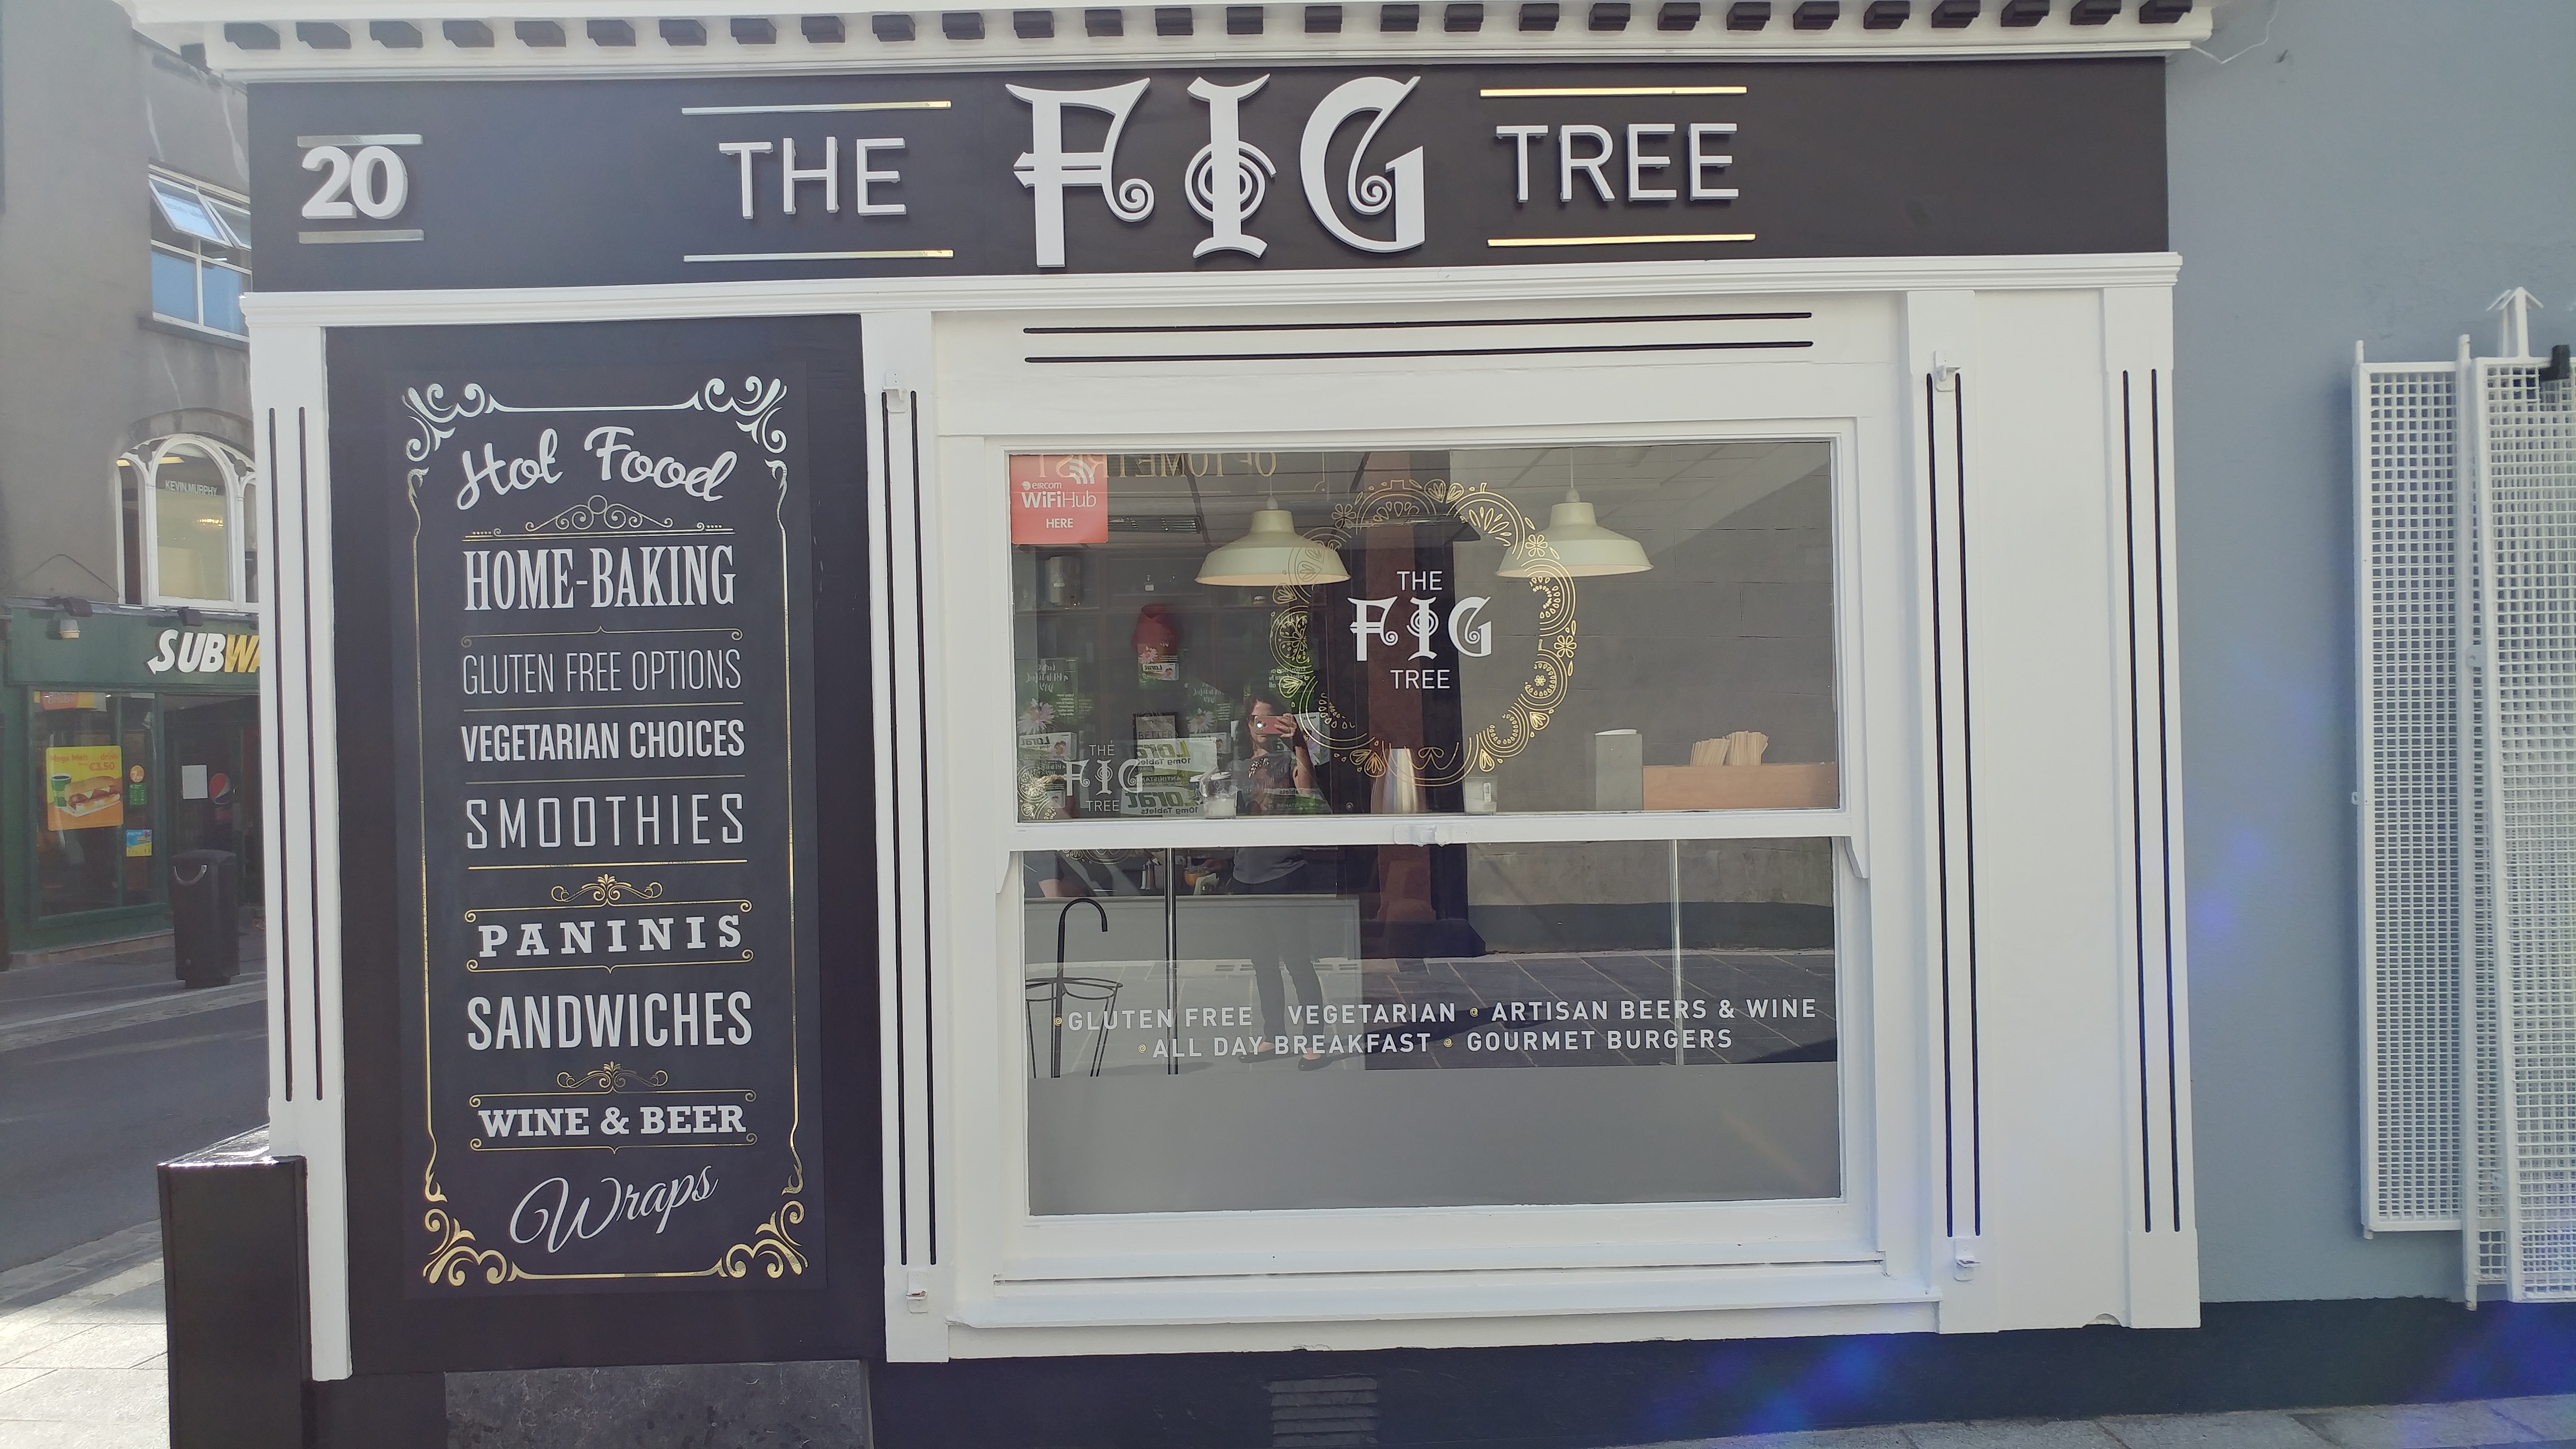
We got up, ate and got some coffee for the road at the cutest coffee shop in town called  The Fig Tree then we were on the road for some more castles. First we stopped at Rock of Cashel. It has tons of history and known for being the seat of the kings of Munster before being converted by St. Patrick. All of the roof is gone but most of the main structure still stands and it sits atop a hill overlooking the city and surrounding land. It is a short walk up a hill to get to the castle from the parking lot and thankfully the castle and grounds is stroller friendly with some slight maneuvering. After rock of Cashel we went into Cork to enjoy lunch at Market Lane on Oliver Plunket St. At first I was unsure how kid friendly this would be but it was perfect. We were able to get a seat outside and enjoy some people watching. I’m not one to ever get salads but the salad I ordered had a fried soft boiled egg on top and oh my gosh I don’t think I’ll ever have a more delicious salad in my life ! The food was delicious the atmosphere of being on a cobblestone street outside of a café was perfect. I don’t think we could have asked for a better second day. Once we were finished with our meal it was off to Blarney Castle. You can’t go to Ireland without kissing the stone!

2018-06-06 09.59.372018-06-06 16.37.342018-06-06 16.38.11IMG_1604IMG_1578IMG_1583


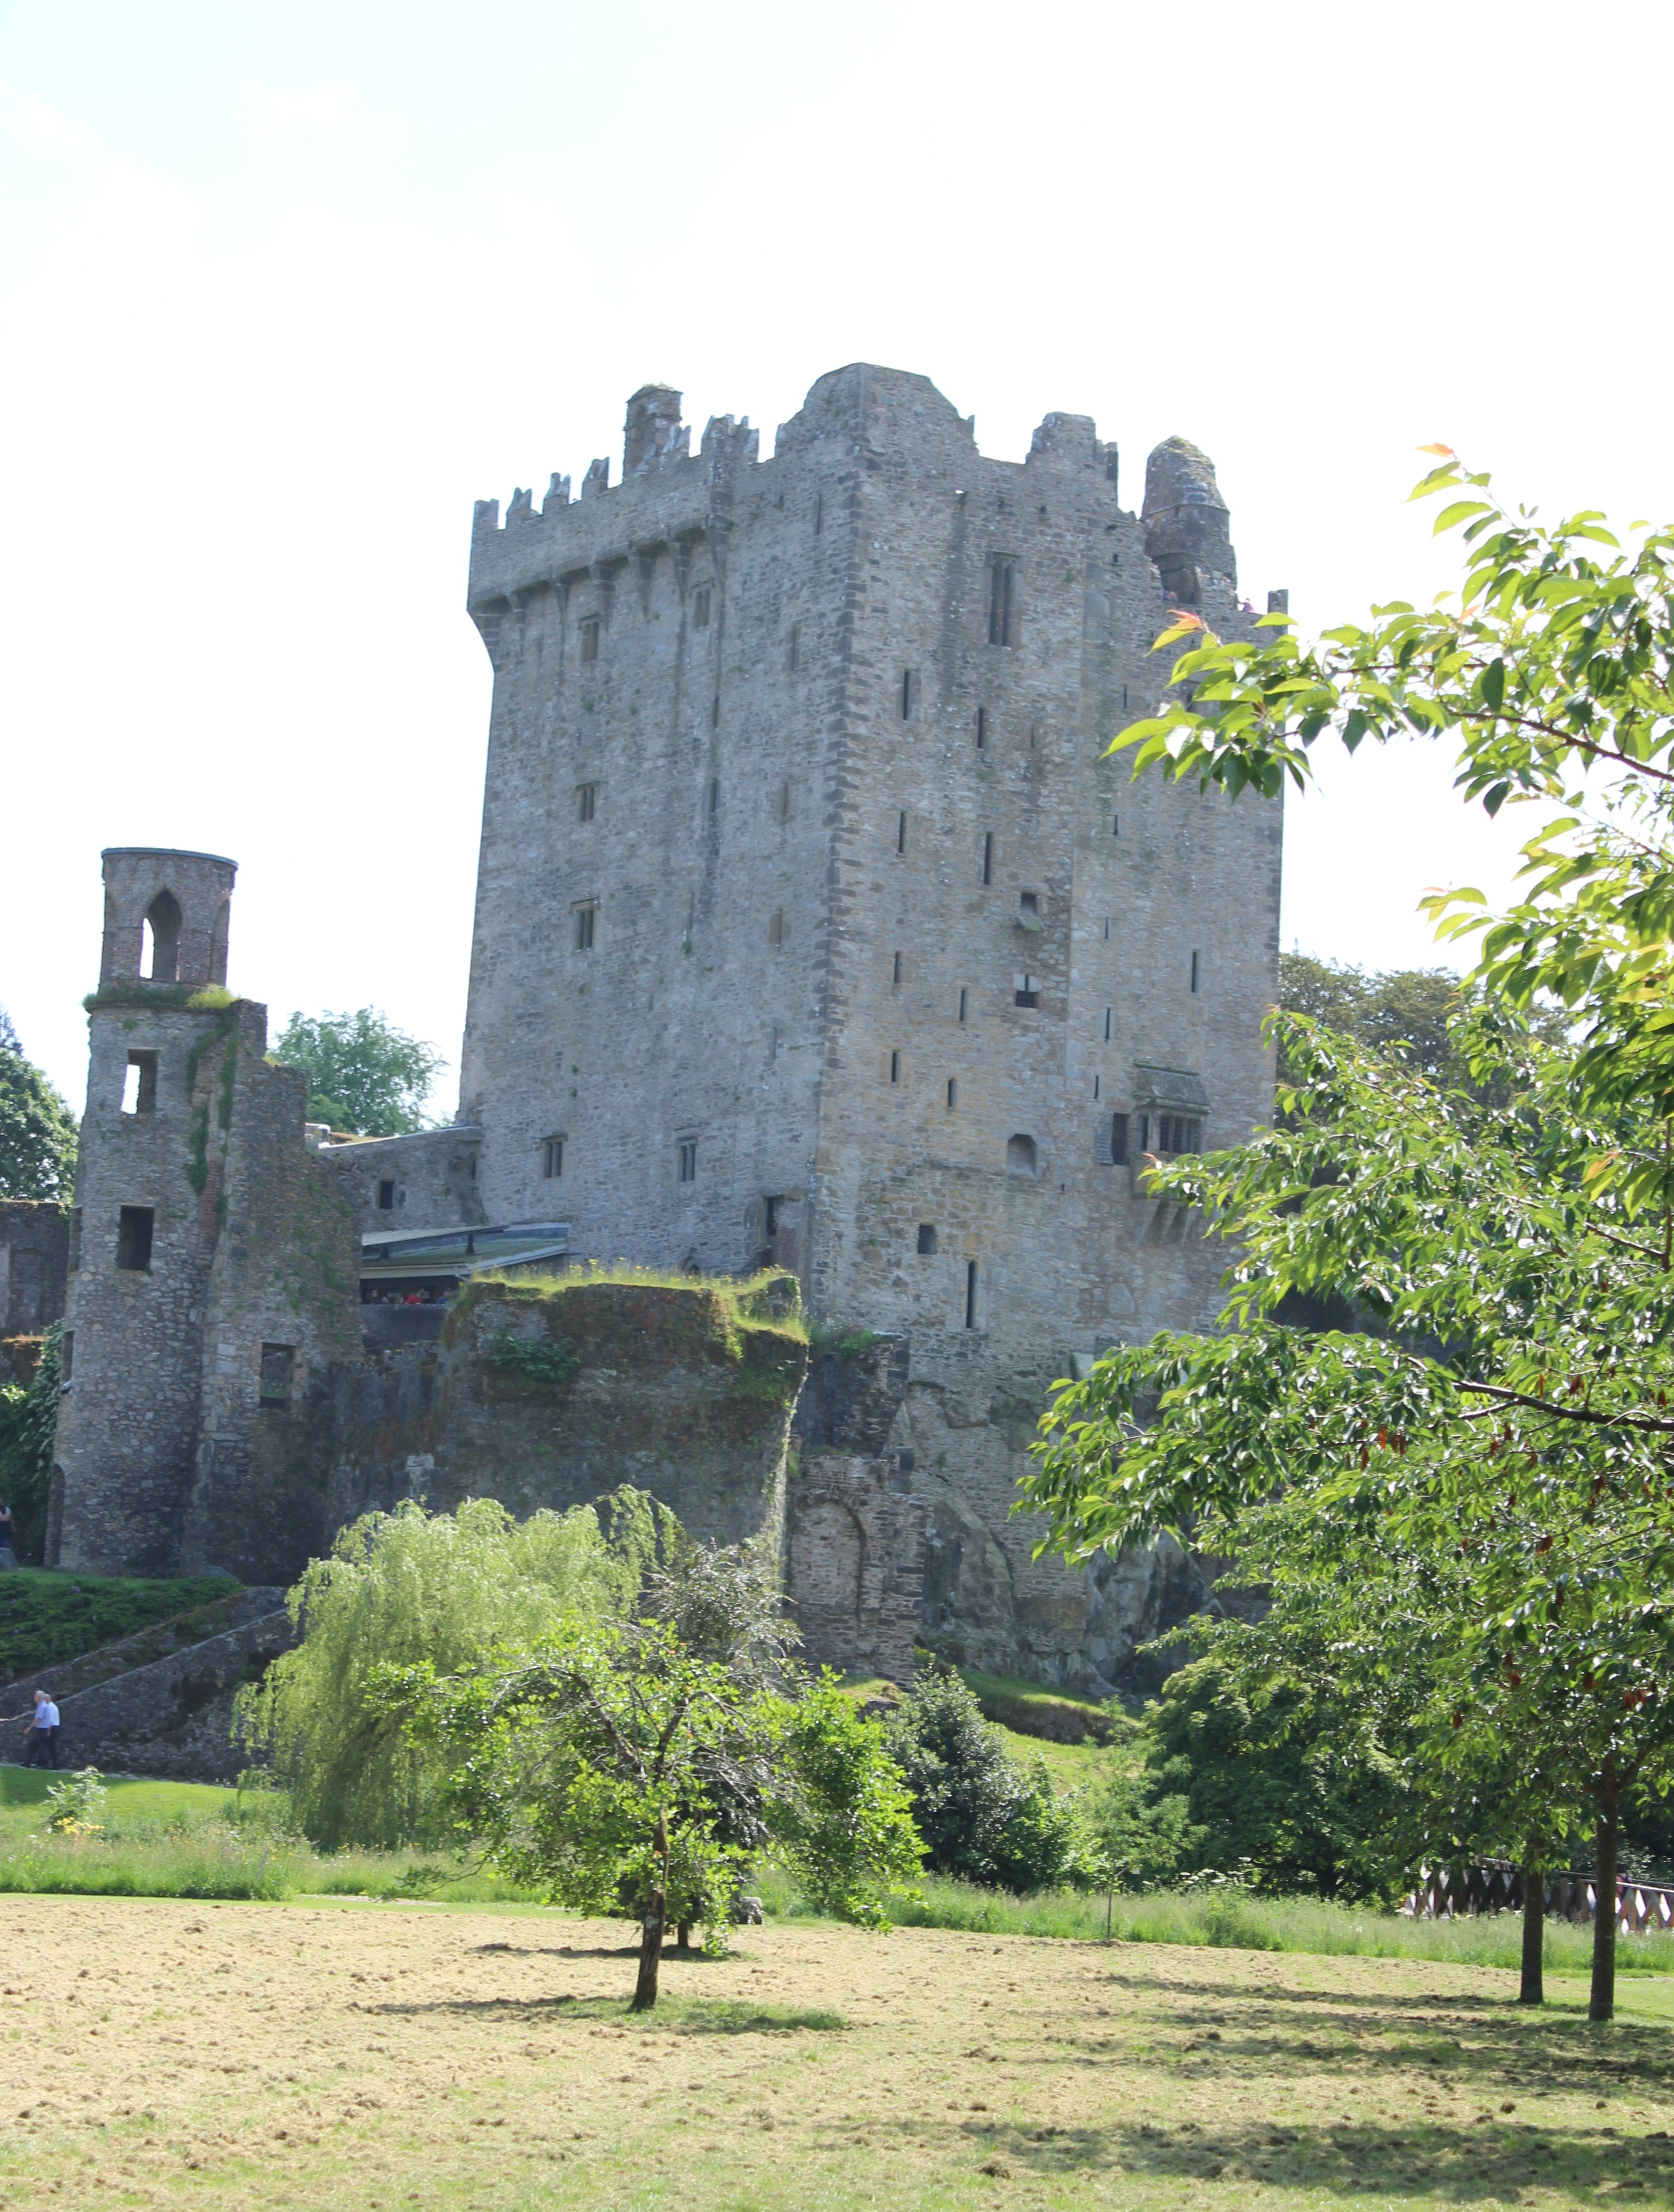
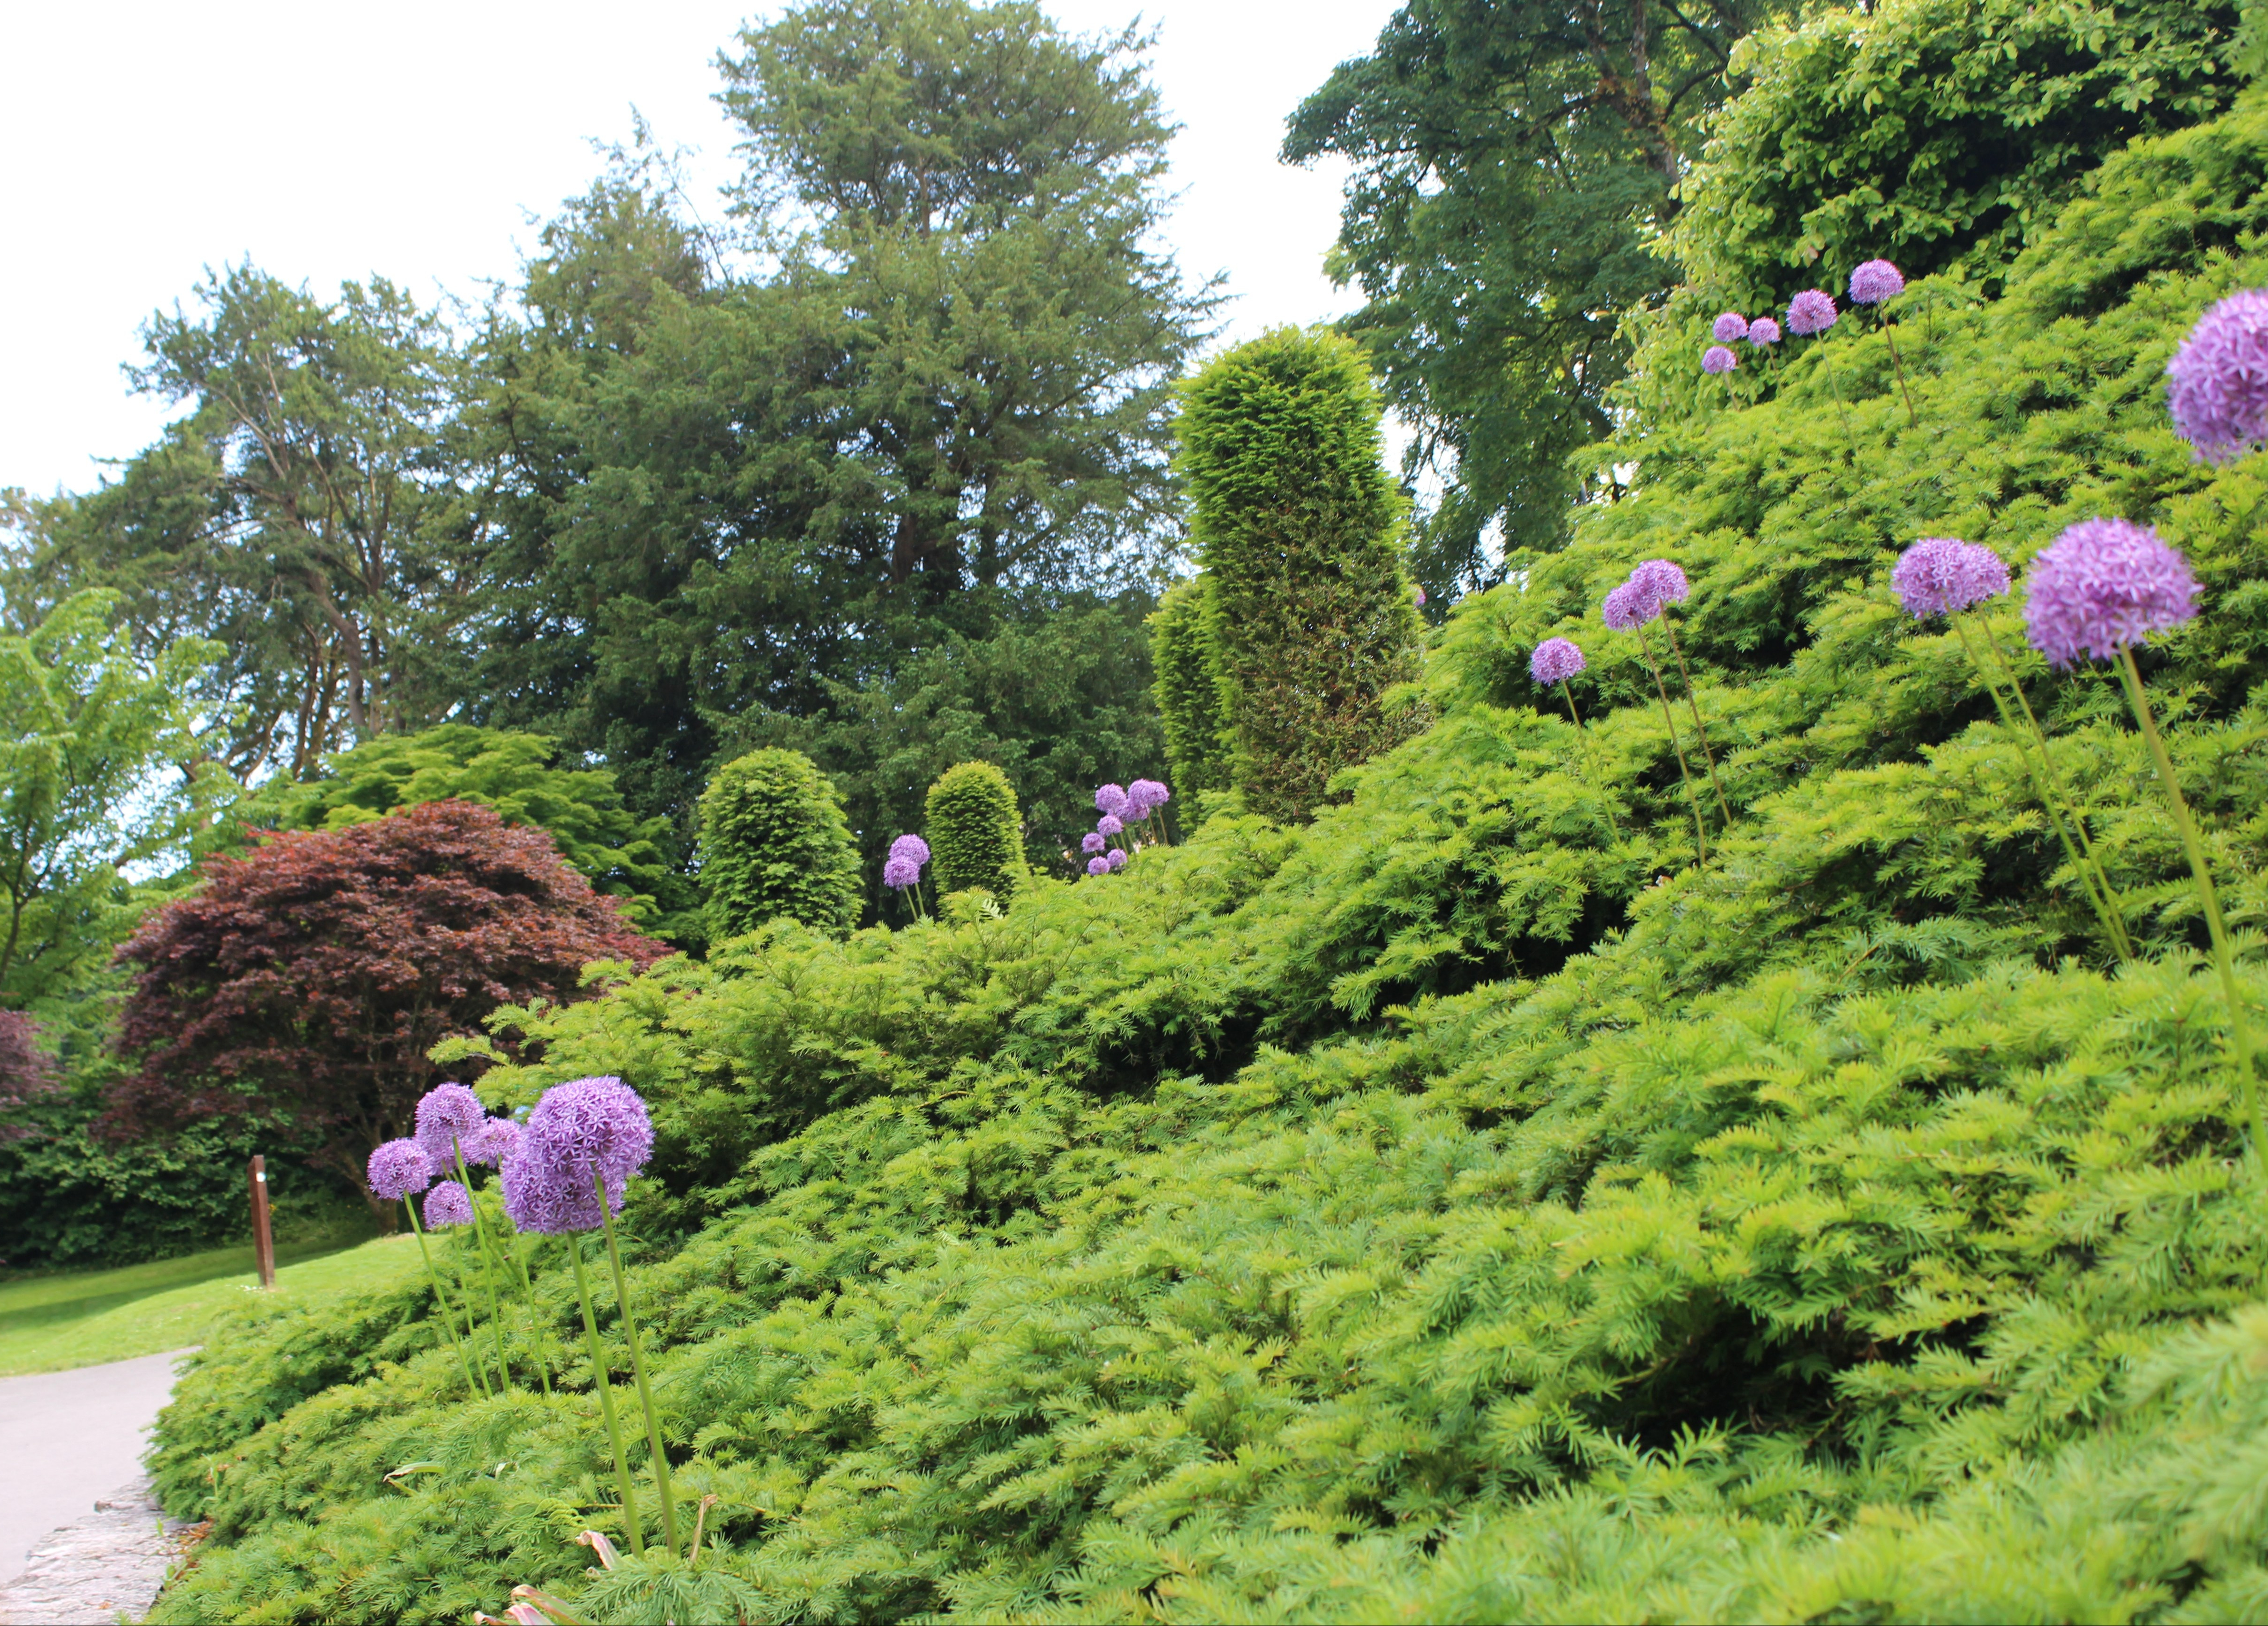
Blarney castle grounds are probably some of the prettiest I’ve seen for a castle. There are gardens everywhere you turn with beautiful pathways covered in trees. You could spend most of your day just touring the grounds.

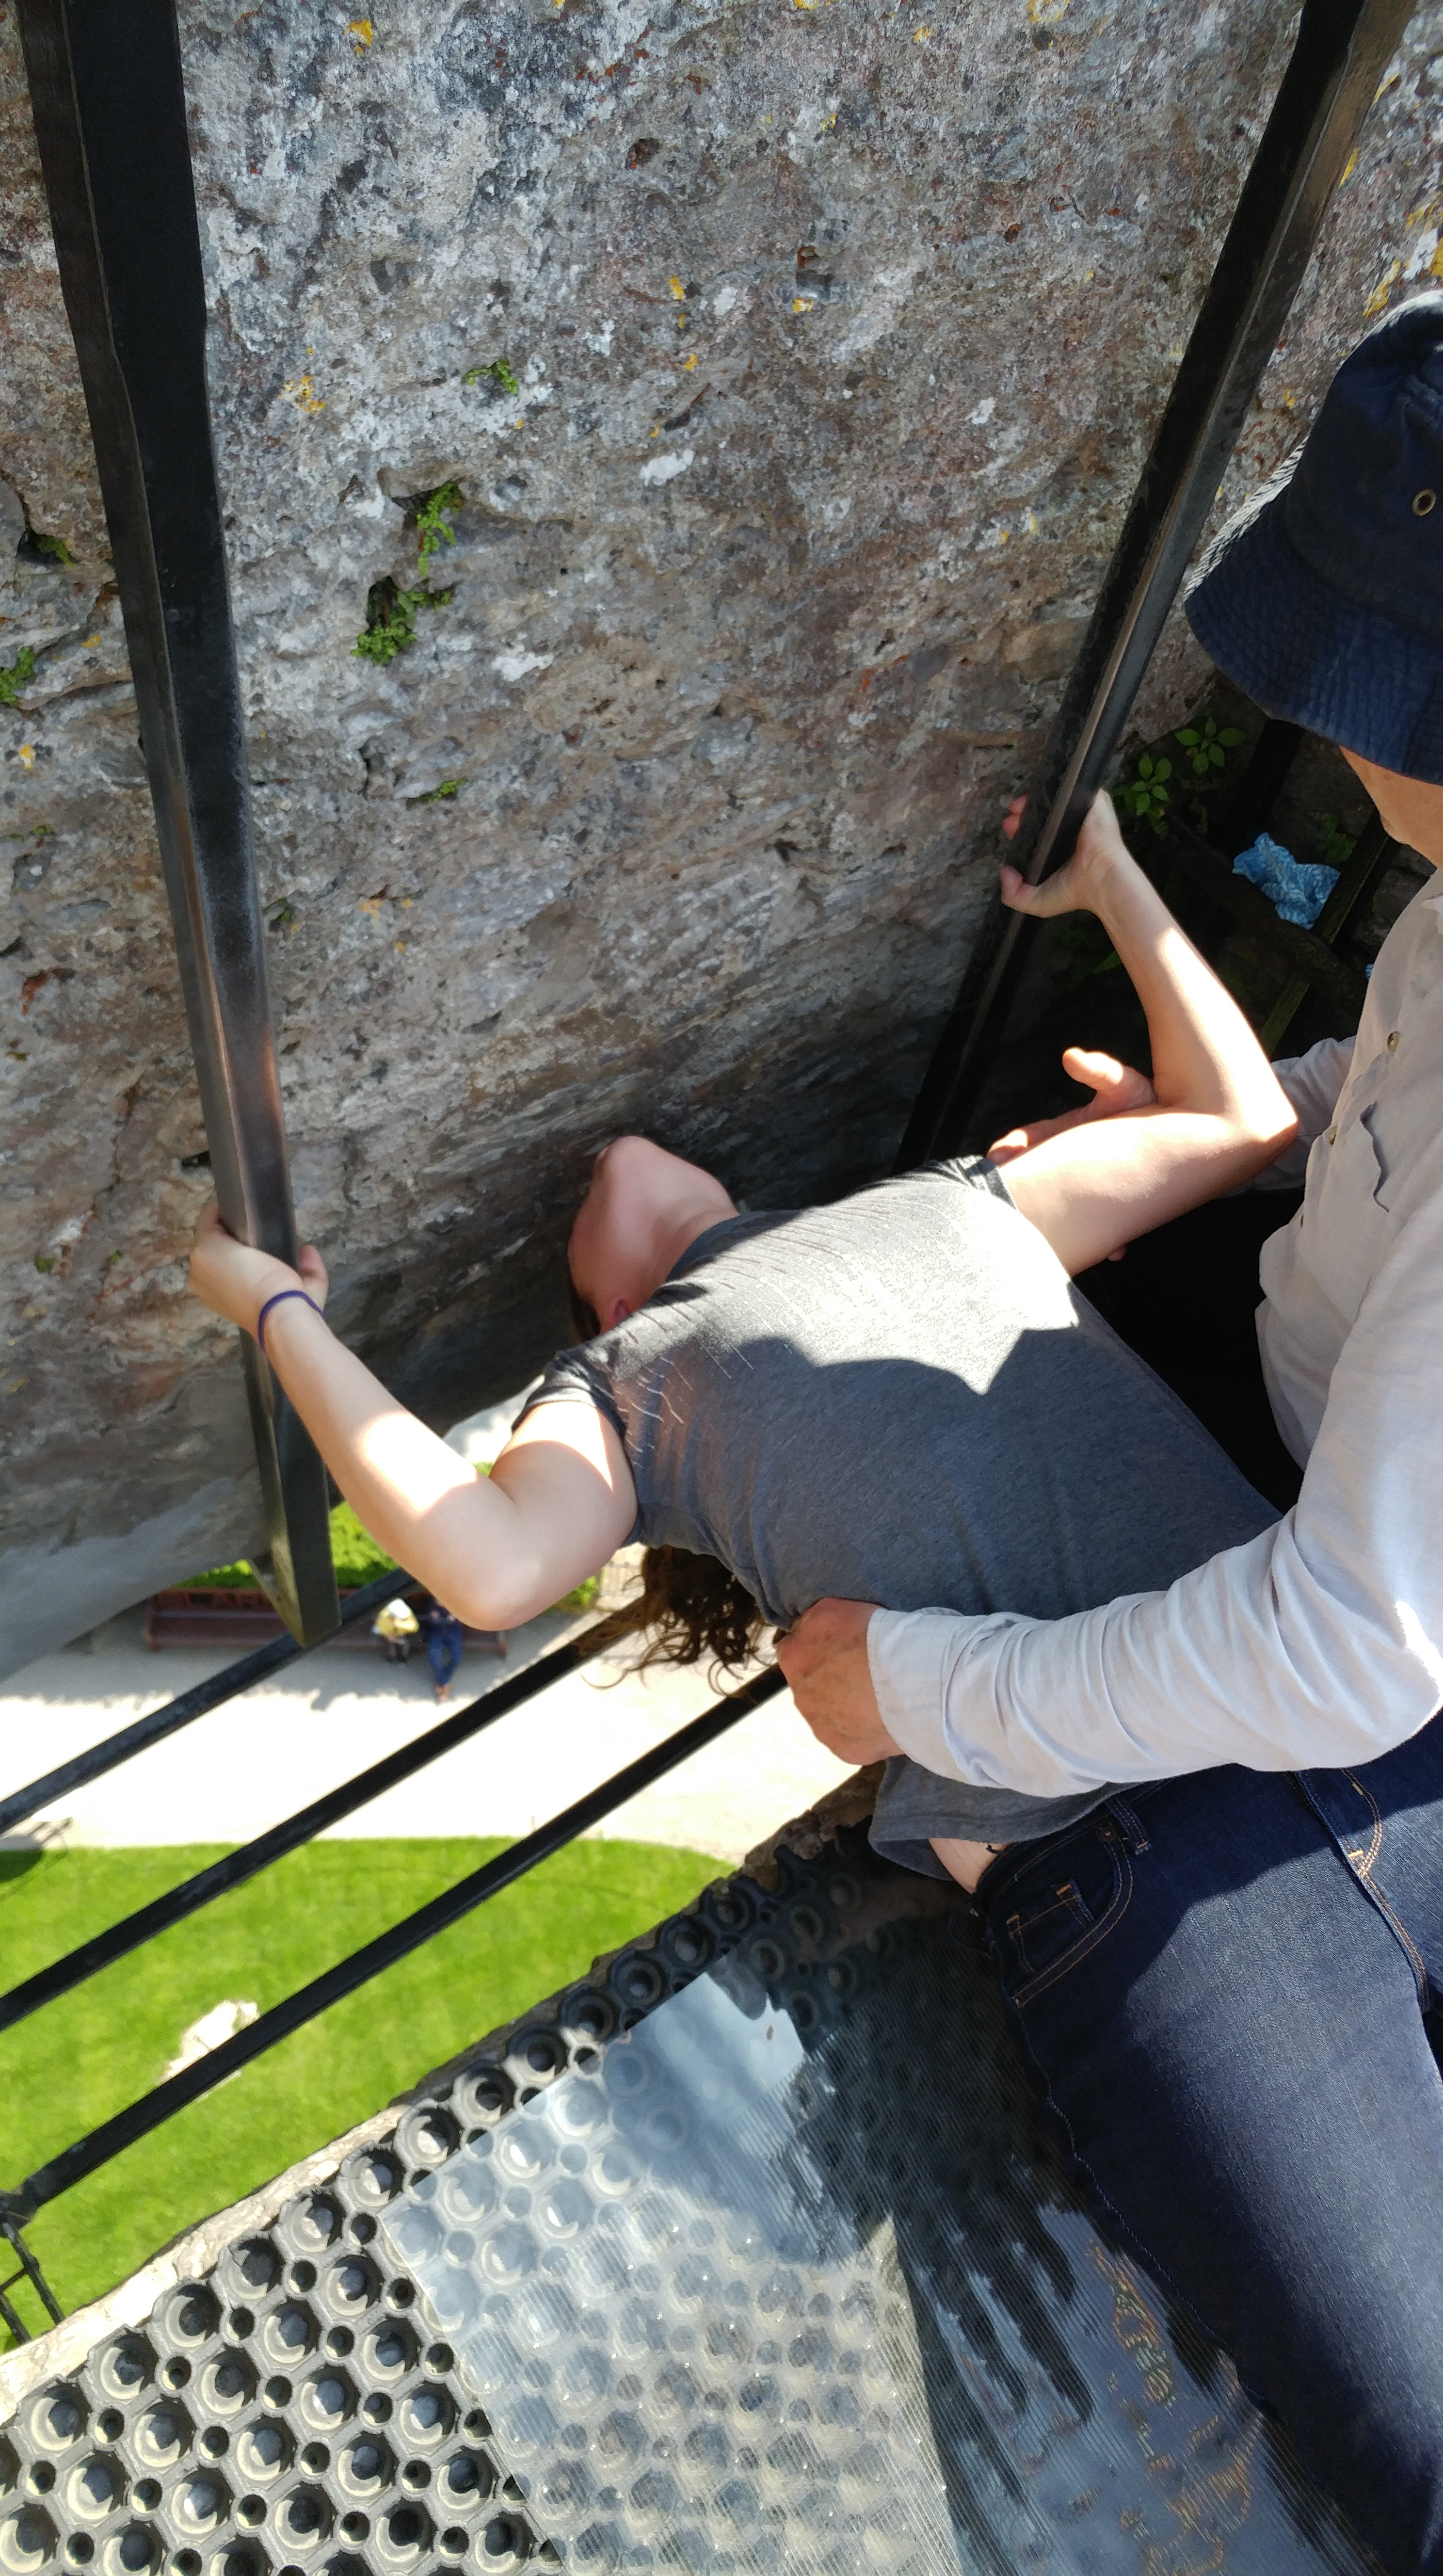
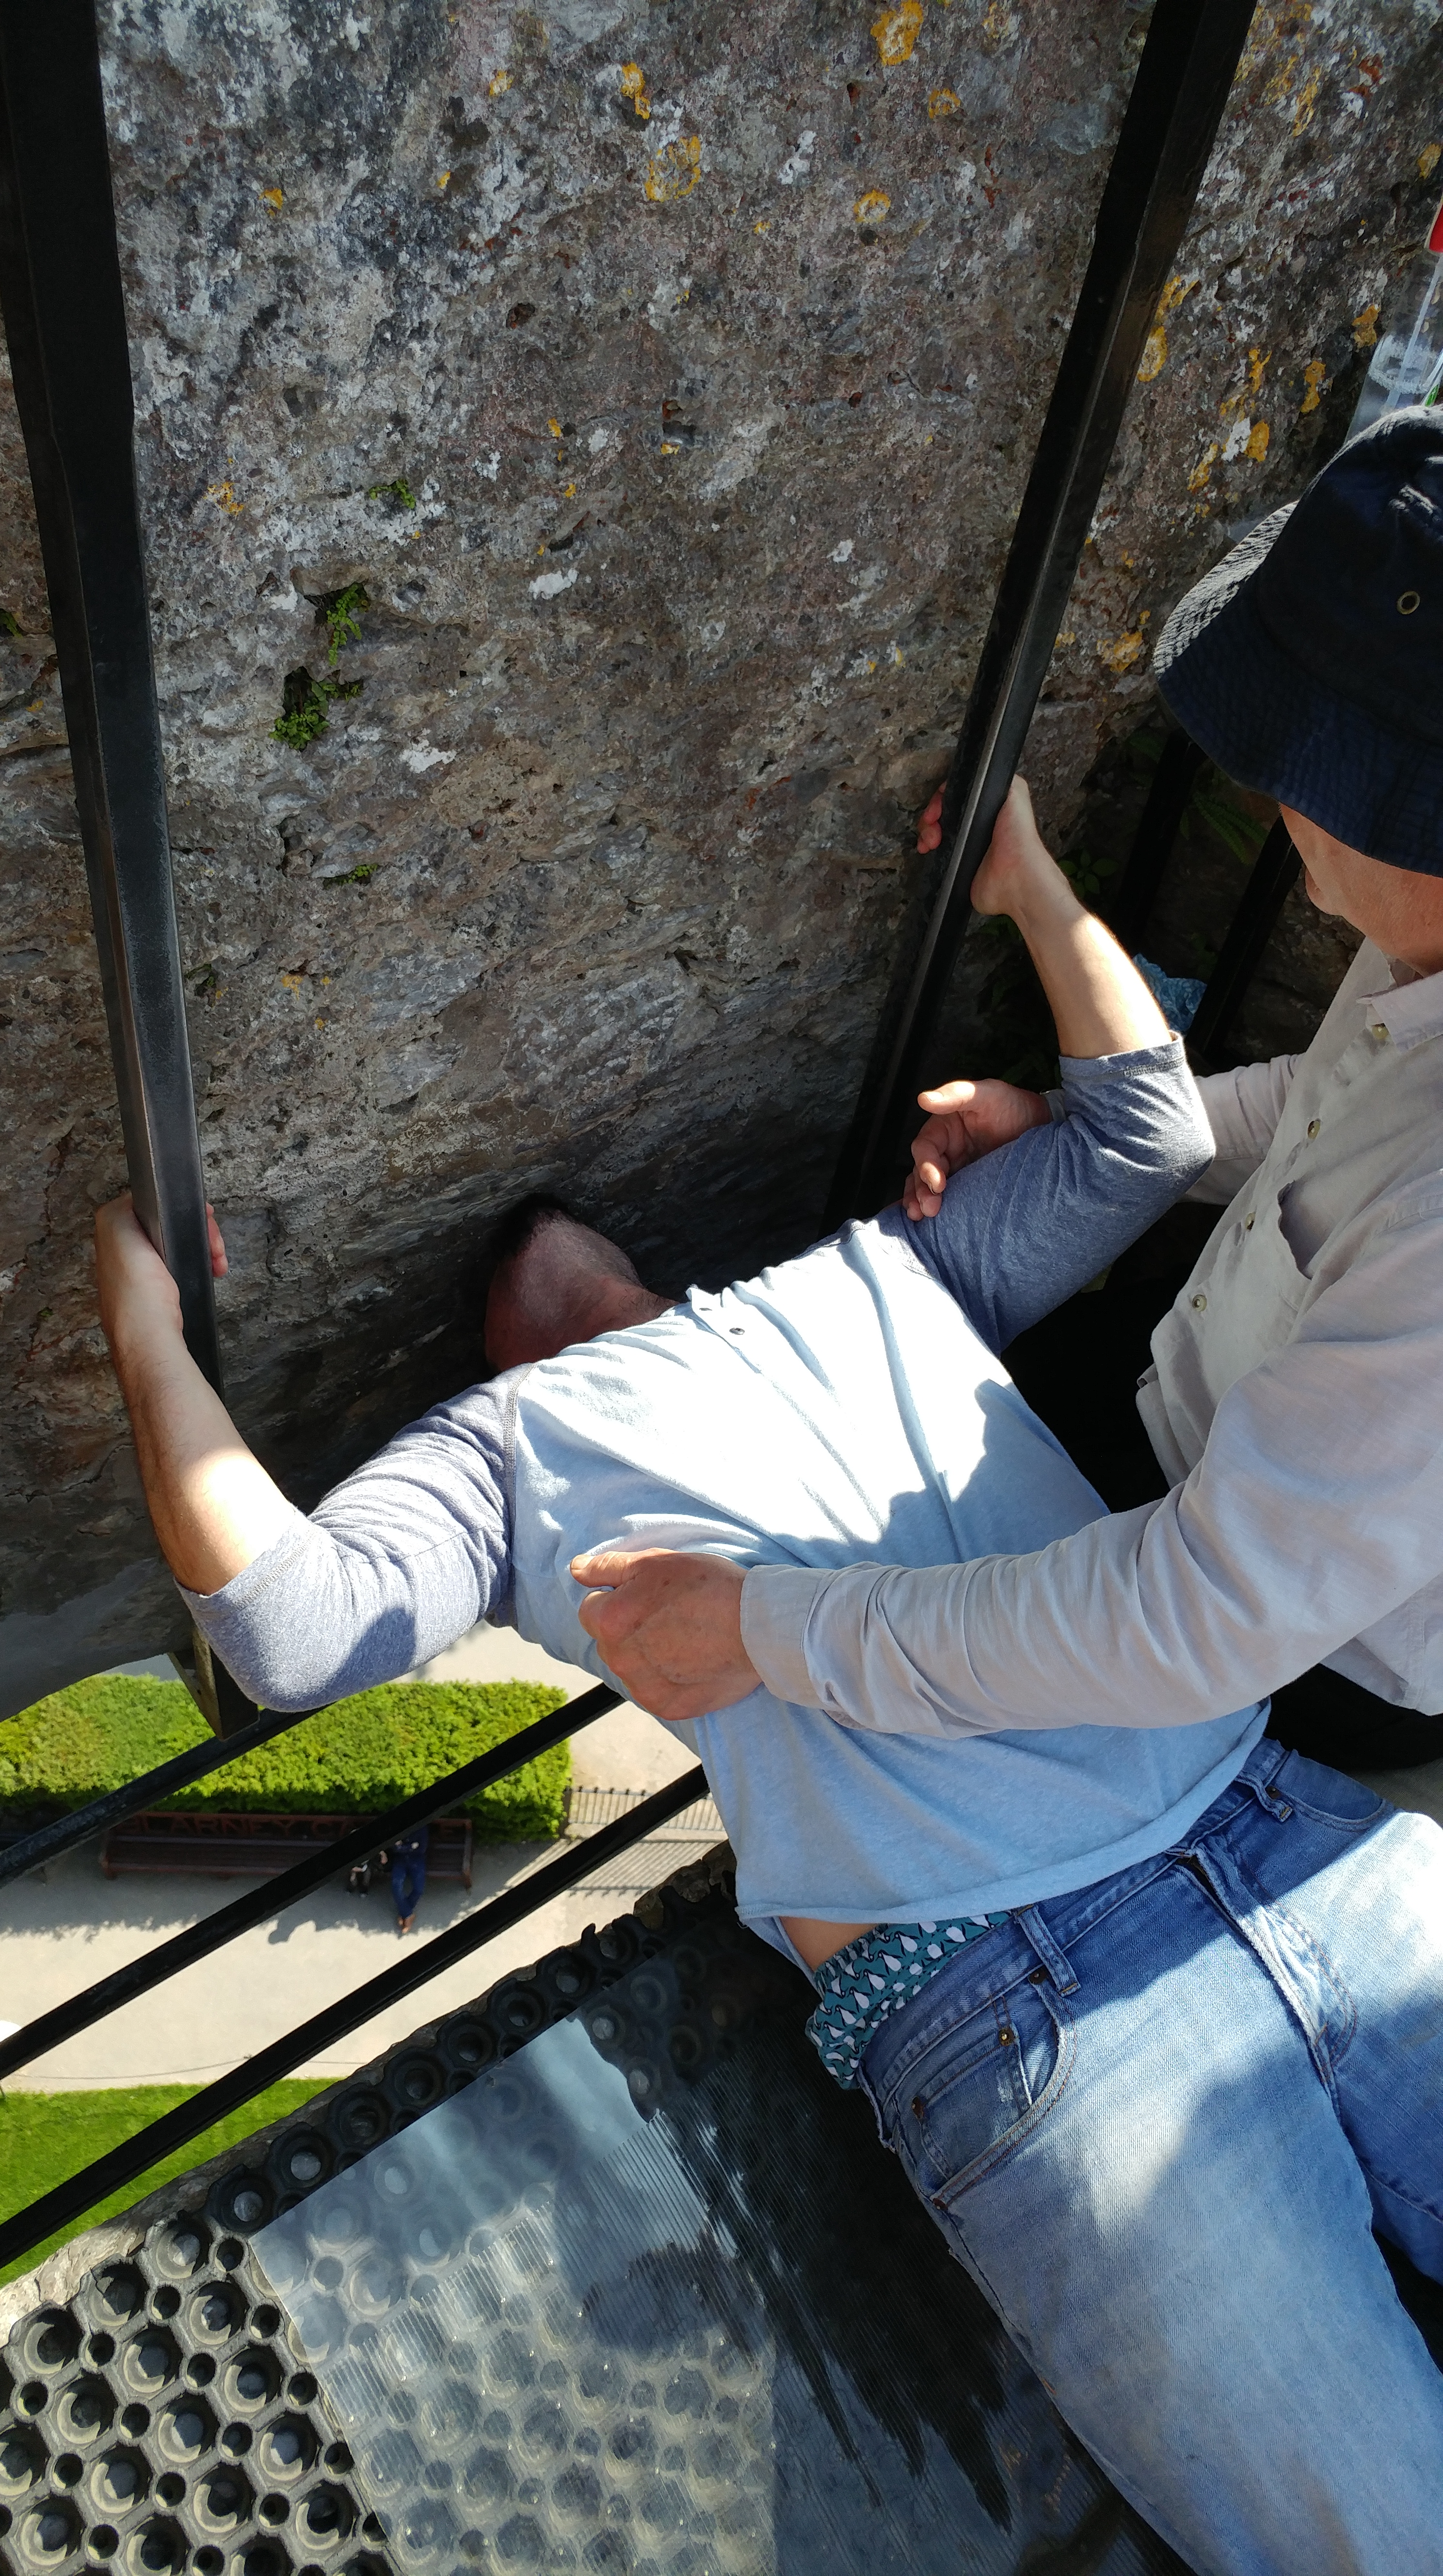
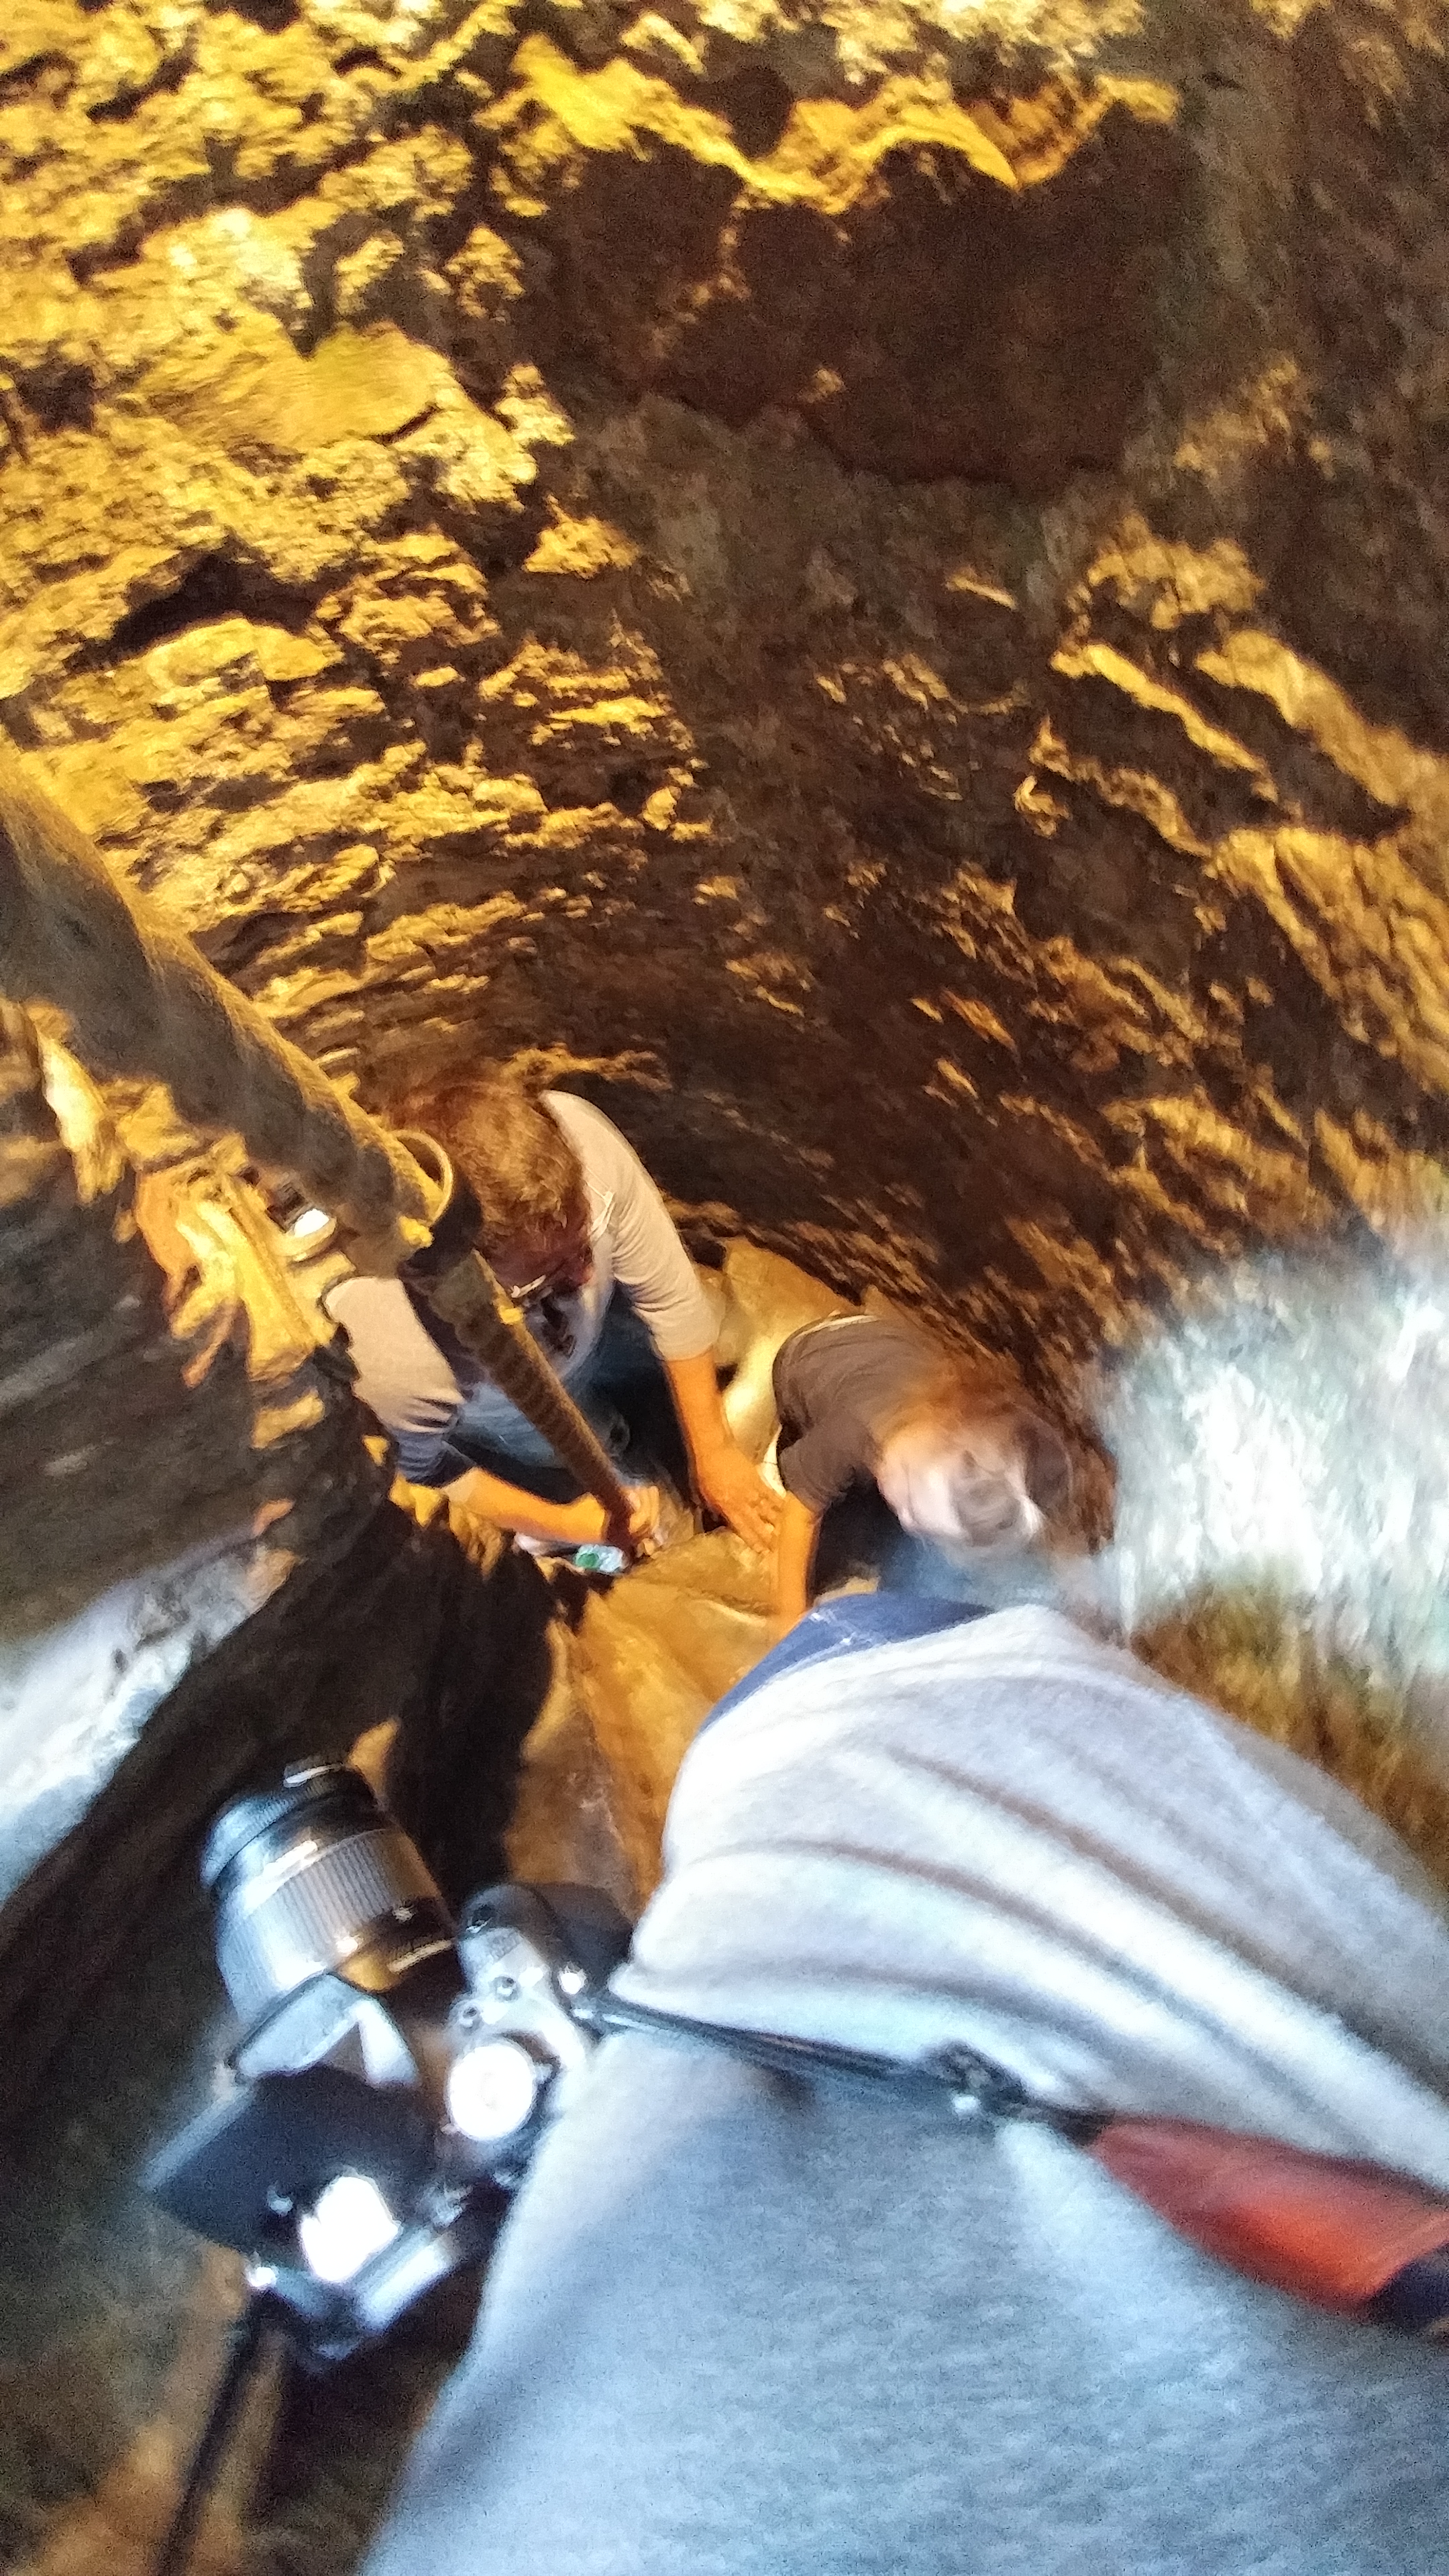
When we got there it was about a 45 min wait to get to the top of the castle to kiss the stone. The nice part is it moves throughout the castle so you can tour the castle as you are waiting in line. The castle itself is not stroller friendly but has stroller parking available right outside the castle entrance. The kids actually did quite well standing in line until we got to the steep stairs that the railing was just a rope running up the middle of the stairs.

2018-06-06 16.27.23

(worst picture ever but shows the stairs of death !)

In my mind they would hit each other and we’d all domino down the stairs. Thankfully that didn’t happen and we made it safely to the top of the castle, which is slightly dodgy with its gapped flooring. The stone kissing was a little scary but so worth it! Someone is there to guide you backwards as you have to lay on your back and slide about 2.5’ off the edge while hanging onto bars as you kiss the stone…sounds fun, right? It was a fun little experience and glad we did it. After the stone we made our way down and out into the poison garden to enjoy more of their beautiful landscaping. By now the kids were losing their mind now that jet lagged had hit them hard and we had ran them all day long. We made it back to the car with me stopping to take some more pictures of the property while my husband dealt with a 2 yr. old throwing his shoes and socks out of the stroller and my 2 girls having meltdowns because they were TIRED! Needless to say they were out within moments of driving away. We headed to Killarney and lucky for the kids it was a 1.5 hour drive so they got a good nap in to help them catch up from all the traveling.


Filed in: Travel • by ford.amanda.m •

Fredericksburg, TX

April 1, 2019

We lived in south texas for 9 years loved all that texas has to offer. We initially moved there because my husband got a job there in the aviation industry and I followed. At first it was scary since I was going from being a 5 hr drive to my friends and family to now being a 24 hr drive to friends and family but I knew we had to make the best of being in a new and exciting place. My dad always said if you can’t find 1 thing you like about where you live you’ll never be happy anywhere. I whole-heartedly believe that. You truly have to make the best of any situation.

It was just the two of us and we didn’t have the same days off together but we still made sure to explore as much as we could with our time together. One of the first places we went to was Fredericksburg, TX. It’s in the Texas hill country and filled with wineries, quaint downtown shopping, camping, parks, horseback riding and so much more. Over the 9 years we lived in Texas I can’t even count how many times we went to Fredericksburg. We’ve met so many Texans who had never been to the hill country and if you’re one of them you need to go plan a trip NOW !

We love coming up and grabbing a glass of wine at Grape Creek Vineyards, sitting out on their patio while the kids play and enjoy the views of the vineyard. Another favorite is Becker Vineyards. Kid friendly, as well, and each spring it hosts a Lavender Festival the first weekend of May. And if you love this wine grab a bottle before you leave since it can’t be found at your local grocery store. Our evening are always spent eating authentic german at Auslander‘s or Altdorf Beirgarten. Altdorf just finished a complete remodel or the entire restaurant and trust me you’ll never want to leave their beirgarten ! Either place you decide schnitzel and potato pancakes is a must order !

Fredericksburg has tons of bed and breakfast inns to stay at but if you have young kids then that options is a no go. When we go up to Fredericksburg we didn’t want to stay in a hotel and luckily my husband found Country Inn and Cottages. We always stayed in a cottage and it’s about 4 miles just outside of town and sits on 200 acres. Each cottage overlooks the rolling hills of the hill country and is fitted with 1 or 2 bedrooms, bathroom, kitchenette, living room with a wood burning fireplace and ,of course, wifi and a tv. And it comes with breakfast vouchers so you can go into town and get breakfast at 1 of 4 different restaurants. The property also has swimming pool, outdoor fireplace and the best part…elk ! Our kids loved going to see the elk. They’re fenced in but they get close enough so you can easily be within feet of the them. We spend so much time at the property because the kids love running around with all the trees, swimming and seeing the wildlife. Another great option is Jellystone. This is a campground chain but it has so many fun things to do for kids. They have events planned on day long and has swimming, bouncing pillow, playground, dog park and so much more.

If you love hiking then you must try out Enchanted Rock. It’s an easy hike to the top of the granite dome and you’ll have a 360* view of the hill country. Since you’ll already be out-of-town you should drive a little further to the wildflower loop in Willow City. It’s a beautiful 13 mile loop through ranches surrounded by wildflowers. You’ll be making lots of stops along the road to take pictures. And if you didn’t get your fix of wildflowers then make a stop at Wildseed Farms. They have acres upon acres of wildflowers in bloom and even sell seeds to fill your own garden.

I can’t say enough good things about Fredericksburg. We absolutely loved coming up for a long weekend and enjoying a slower pace.

OLYMPUS DIGITAL CAMERAOLYMPUS DIGITAL CAMERAOLYMPUS DIGITAL CAMERAOLYMPUS DIGITAL CAMERAOLYMPUS DIGITAL CAMERA

OLYMPUS DIGITAL CAMERA


Filed in: Travel • by ford.amanda.m •

Mudroom Coat Wall

March 10, 2019

So, I know there are a million tutorials out there for a board and batten mudroom wall but I thought I’d still post my how to. This was my first real DIY project that would be semi permanent and I couldn’t just take it off the wall because it didn’t turn out well. I am planner, type A personality and it needed to be as perfect as possible. I made multiple sketches trying to decide what exactly I/we needed in the mudroom/laundry room. After lots of drawings and pinteresting (that’s a word, right ?) I had finally decided what to do and how it would look.

2019-02-09 16.44.25

First I made a chalk line on each of the studs since that was were my vertical pieces would be going.  If you have a wall outlet like I do then that is an easy starting point since an outlet is always attached on the side of a wall stud. From there I used my stud finder to find the other 3 and then measured that they were 16 inches apart. Then I had to decide how tall I wanted the coat hooks to be. It wasn’t by any science or math. I grabbed a coat and held it up and decided it was a manageable height for myself and my husband. I then had my 6 year old do the same for the lower hooks since they would be using these for their backpacks and their coats. Now came the fun part…buying the supplies !

Here’s what you’ll need:

  • 3- 4x6x1
  • 1- 6x6x1
  • 4- 3x6x1
  • 1- 2x6x1
  • 1- 2x6x2
  • miter saw
  • nail gun
  • nails
  • liquid nails
  • caulk
  • wood filler
  • level

First I measured the length for the bottom piece, cut it and then put liquid nails on the back of the board using my 2x6x1 for a spacer and support on the bottom I nailed it to the wall. I used my chalk lines as a reference for where the studs were and placed 2 nails along each stud. Next, I measured my 6x6x1 for the top of the frame and made sure that it would be level with the bottom piece i just placed. Then same process I put a long zigzag bead of liquid nails along the back, made sure it was level, placed on the wall and nailed it where each stud was. Next I did the left and right vertical pieces. Once all my edge pieces were done it was time to do the vertical pieces on each stud. I measured each vertical piece individually and still did a long bead of liquid nails just for extra support before nailing them in. Once all your vertical pieces are  in place then it’s time to do the horizontal spacers that will also be used as your second row of hooks. Again, measure each one individually before cutting. Since there would be no stud behind these pieces to nail into I made sure it got a good amount of glue without spilling out the sides because well kids can be destructive and I’d like this to last. Once I was all finished framing it out it didn’t quite look complete so that’s when I went out and bought a 2x6x2 for a decorative finished look to the top. I cut it to length and nailed it every 8-10 inches on top of my 6x6x1 and it made it look so much better!

2019-02-12 20.46.50

Once all your wood is on the wall it’s time to caulk and fill in the nail holes. I love using this handy tool for getting a perfectly smooth finish along each seam. I cut my tip where it shows 1/4 of an inch on the caulking tube and using a caulk gun I placed a bead along the inside seams where the wood and wall met, then scrape off the remainder to get a smooth finish. You’ll have some caulk come off each time and I usually put it in a paper bathroom cup just in case later I need to fill anywhere in and I can use the leftover in the cup. Also, keep a damp towel with you so you can clean your tool each time. After the inside was complete I also caulked the top and right side (didn’t need to do the left because it bumped up to my door frame). After all your caulking is complete then it’s time to use your wood filler to fill in all the nail holes and to smooth out any areas where wood touches wood that might not be perfect. Be sure to scrape off the excess wood filler before letting it dry. After it’s dry, sand over the wood filler to give it a smooth finish. I took a very damp washcloth and wiped down the entire wall so it would be free of dust before I painted and vacuumed the entire area. The last thing you want is dust while your painting your hard work.  Last step-PAINT and Hooks !! I painted it Sherwin Williams Iron Ore and finished it with  brass coat hooks from home depot and these from target. I absolutely LOVE LOVE LOVE the way it turned out.

2019-02-14 17.37.582019-02-14 22.17.21

It took me a few days to finish this project because well 3 little kids and a full-time job but you can definitely get this done in 1 day (minus the hanging of the hooks). I did it all by myself exect for the couple of times I needed my husband to hand me the nail gun or hold up the wood for a moment while I nail. So, if you plan to do this alone at least have a helping hand that you can yell at from across the house :).

A couple of tips I have is if you plan to put one of your pieces up against the door frame then rip away the caulk from the area that your piece of wood will go up against that way you don’t have a slight gap and your wood can rest snug up against the door frame. The other is buy some shims or make some from your spare pieces of wood. Not all walls are straight and level. Mine had a slight curve in so when I put my vertical piece up against my horizontal piece my vertical sunk in slightly….so, I made myself a little shim so it would be level with the horizantal piece. Since you plan on caulking you’ll never see it.

For my first Diy project in this house I’m super happy the way it turned out. It wasn’t that hard to do just a bunch of little steps. My husband loved it so much that he wants to do our ENTIRE master bedroom….uhhh not sure if ready for all that but we shall see!

Filed in: DIY • by ford.amanda.m •

  • « Previous Page
  • 1
  • …
  • 4
  • 5
  • 6
  • 7
  • 8
  • Next Page »

DIY on a budget! Learning and teaching DIY and giving you the confidence to tackle any project.
~Follow along @moscatoandflowers~

Search The Blog

Categories

  • Baking
  • Celebration
  • Design
  • DIY
  • Travel
  • Uncategorized

Popular Posts

Mood Board: Cozy Living Room

Disclaimer- this post contains affiliate links, which means I receive a small commission for certain items purchased through links. Having a mood board help put all your ideas swirling around in your head to a true vision. It also helps to see what a can become or how every piece will come together. I truly […]

One Day Makeover

Disclaimer- this post contains affiliate links, which means I receive a small commission for certain items purchased through links. When I was asked to do a makeover for a friends primary bedroom I started researching immediately all the things i could do in the room to maximize the space. People think because they have a […]

Pinterest

Follow

@moscatoandflowers

Recent Posts

  • Mood Board: Cozy Living Room
  • One Day Makeover
  • One Room Challenge-Week 1
  • It’s The Most Wonderful Time Of The Year
  • New England Travel

Recent Comments

No comments to show.

Archives

  • August 2022
  • April 2022
  • October 2021
  • September 2021
  • August 2021
  • December 2020
  • September 2020
  • October 2019
  • September 2019
  • August 2019
  • April 2019
  • March 2019
  • February 2019
  • January 2019
  • September 2018
  • August 2018
  • July 2018

Categories

  • Baking
  • Celebration
  • Design
  • DIY
  • Travel
  • Uncategorized

Copyright © 2025 · Moscato and Flowers LLC | Theme by Blog Pixie

Copyright © 2025 · Coffee & Sundays Theme on Genesis Framework · WordPress · Log in