• Home
  • Contact
  • Blog
  • Categories
    • Baking
    • Celebration
    • Design
    • DIY
    • Travel
  • Disclaimer
    • Instagram

Welcome

Stair Update and Tutorial

October 3, 2021

Disclosure: “I love sharing all my projects around the house and new decor finds along the way but I also know how overwhelming it can feel to start a project and not know the tools you need or how to style something around the house. Below I have included affiliate links to tools and products I use and love, which means I get a commission if you decide to make a purchase through them.”


This is what I like to call the snowball effect when it comes to updating your house. You think ‘I’m going to update my flooring upstairs and it’ll look fantastic’ but what you are really saying is ‘I’m updating my flooring upstairs, which then means I’m going to also have to update my stairs’-our stairs look disgusting. Yes, maybe that’s a little dramatic but it wasn’t the prettiest thing to look at next to our new floors.  When we refinished our hardwood floors downstairs I had talked to the hardwood refinisher and asked to give me a estimate on what it would cost to add hardwoods upstairs and redo both sets of stairs and it was going to cost between 30-40k with each stairwell costing around 8-10k! Well after a kitchen renovation that was nowhere in the budget nor did either of us feel that it would be a worthy investment. Oh, and on top of that that price was before wood started to cost double or triple what we had paid.

 Another consideration was also getting a custom runner made or adding carpet back to the stairs but neither of those options thrilled me and good quality carpet isn’t cheap.  So, I spent a lot of time just thinking about what I would actually like on my stairs and also not cost thousands of dollars. I knew I wanted black railing and steps and when I found the rug line by Chris Loves Julia with Loloi I instantly fell in love with the Denim and Spice color and decided I would use that as a runner. I also considered a washable rug for the project but quickly realized I would never care enough to take the runner off and wash it on a regular basis so low pile runner for the win!

Here is what our stairs looked like before. I think they even look worst in these pictures but that’s what beige carpet looks like after 21 years and a lot of kids!


The first step was removing all the carpet, nails and tack strips and ,of course, filling nail holes galore. Prep is always the worst part of any project but it gives you the best finish so never skip it. After removing all the nails I filled in all the nail holes that wouldn’t be hidden by the runner rug. Yes, cutting some corners are ok!

Next I used a deglosser on all the handrails and the spindles and I’m glad I did. In doing so I found that it just loosened up all the gunk of 20 years of hands and cleaner being used on the handrail and made for a much smoother finish. One more step I added in was caulking all the seams along the tread. It’s something small but gives the steps a more finished look.

Next I taped off along the entire tread since using a foam brush is a bit harder to get a smooth line. Once everything is prepared it’s time for stain. I used a 2 inch foam brush and just did a coat on all the spindles and handrail and also did the tread but only enough that it would come in another inch or two inside where the rug would be laying on the tread. When using this stain make sure that it’s not a thick coat to avoid runoff drips. The nice part of this stain is that you don’t have to remove it after it sets for X minutes. It goes on more like a paint. It took 2 coats that I did over two days to allow enough drying time in between each coat. While I waited for the stain to dry I decided it was a good time to touch up all the white trim and paint the riser for each stair, again only painting the riser so it would be one or two inches inside where the rug would hit. 

 Now time for the fun part- the rug! By this time it felt like I could finally see the light at the end of the tunnel! First, I measured the width of my tread and then the width of my rug and subtracted rug from the tread and came up with a number and then divided that by two and that is how much space you need on each side of your runner . (width of tread-width of rug= X then divide by two ie, 33-27.5=5.5/2=2.75) Then I measured in 2.75 inches and marked the outside of that using my laser level and painters tape so I could follow along when I stapled my rug down. Now, for most of my project I used carpet tape I found on amazon and had amazing reviews and overall it holds up quite well but I found something better. When finishing up the backstairs I ran out of carpet tape and went to home depot and found this carpet tape and it has a much stronger hold than the brand I found on amazon. So, for each tread and riser I did two to three strips of carpet tape (depending on width of tape) and left the backing on and then as I went down each step and tread I would remove it. I also used this carpet tool to get the carpet to sit in tight where the tread and riser meet and smooth out the rug on the tape. As I was doing each tread I added staples every 2 inches under the bullnose, where the tread meets the riser and I added 1 on each side just above the bullnose on the tread. Now I will say working with a 12′ rug was a slight challenge but I just went slowly and made sure to stay along my tape line. When I was close to the end of the first rug I cut it so it would staple under the bullnose of one of the treads. This hides the seam and you can start your next runner right under it. Note- if you have a runner with a border you will need to cut off the border so it doesn’t look like you’re adding in a second rug. You want it to appear as if it is one rug,  

Once the stairs were done it felt like such an accomplishment because I had never done something like this before and for around $300 it looks beautiful. I’m not sure how many hours were spent on it but it wasn’t enough to ever justify spending 10k on our stairs and if years down the road I want to replace the rug or change my style it’ll be easy to remove the rug and staple a new one down.

The tools that I used:

  Air compressor Scissors Tape Carpet Tool Rug

Filed in: DIY • by ford.amanda.m •

Update Existing Shower Frame

December 9, 2020

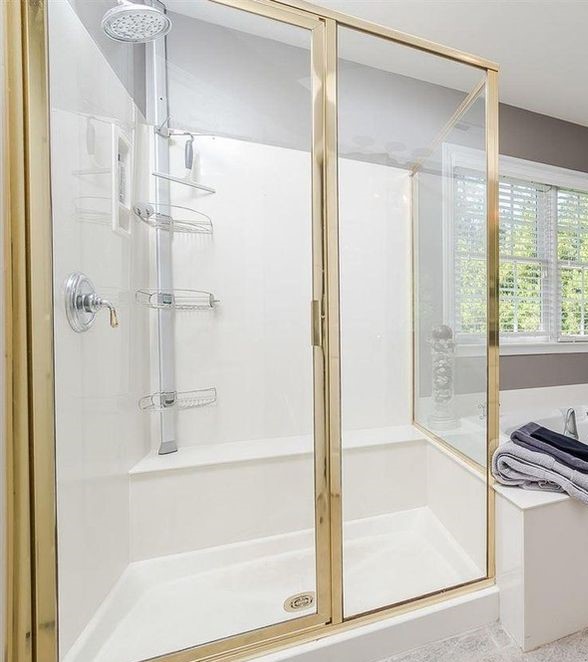
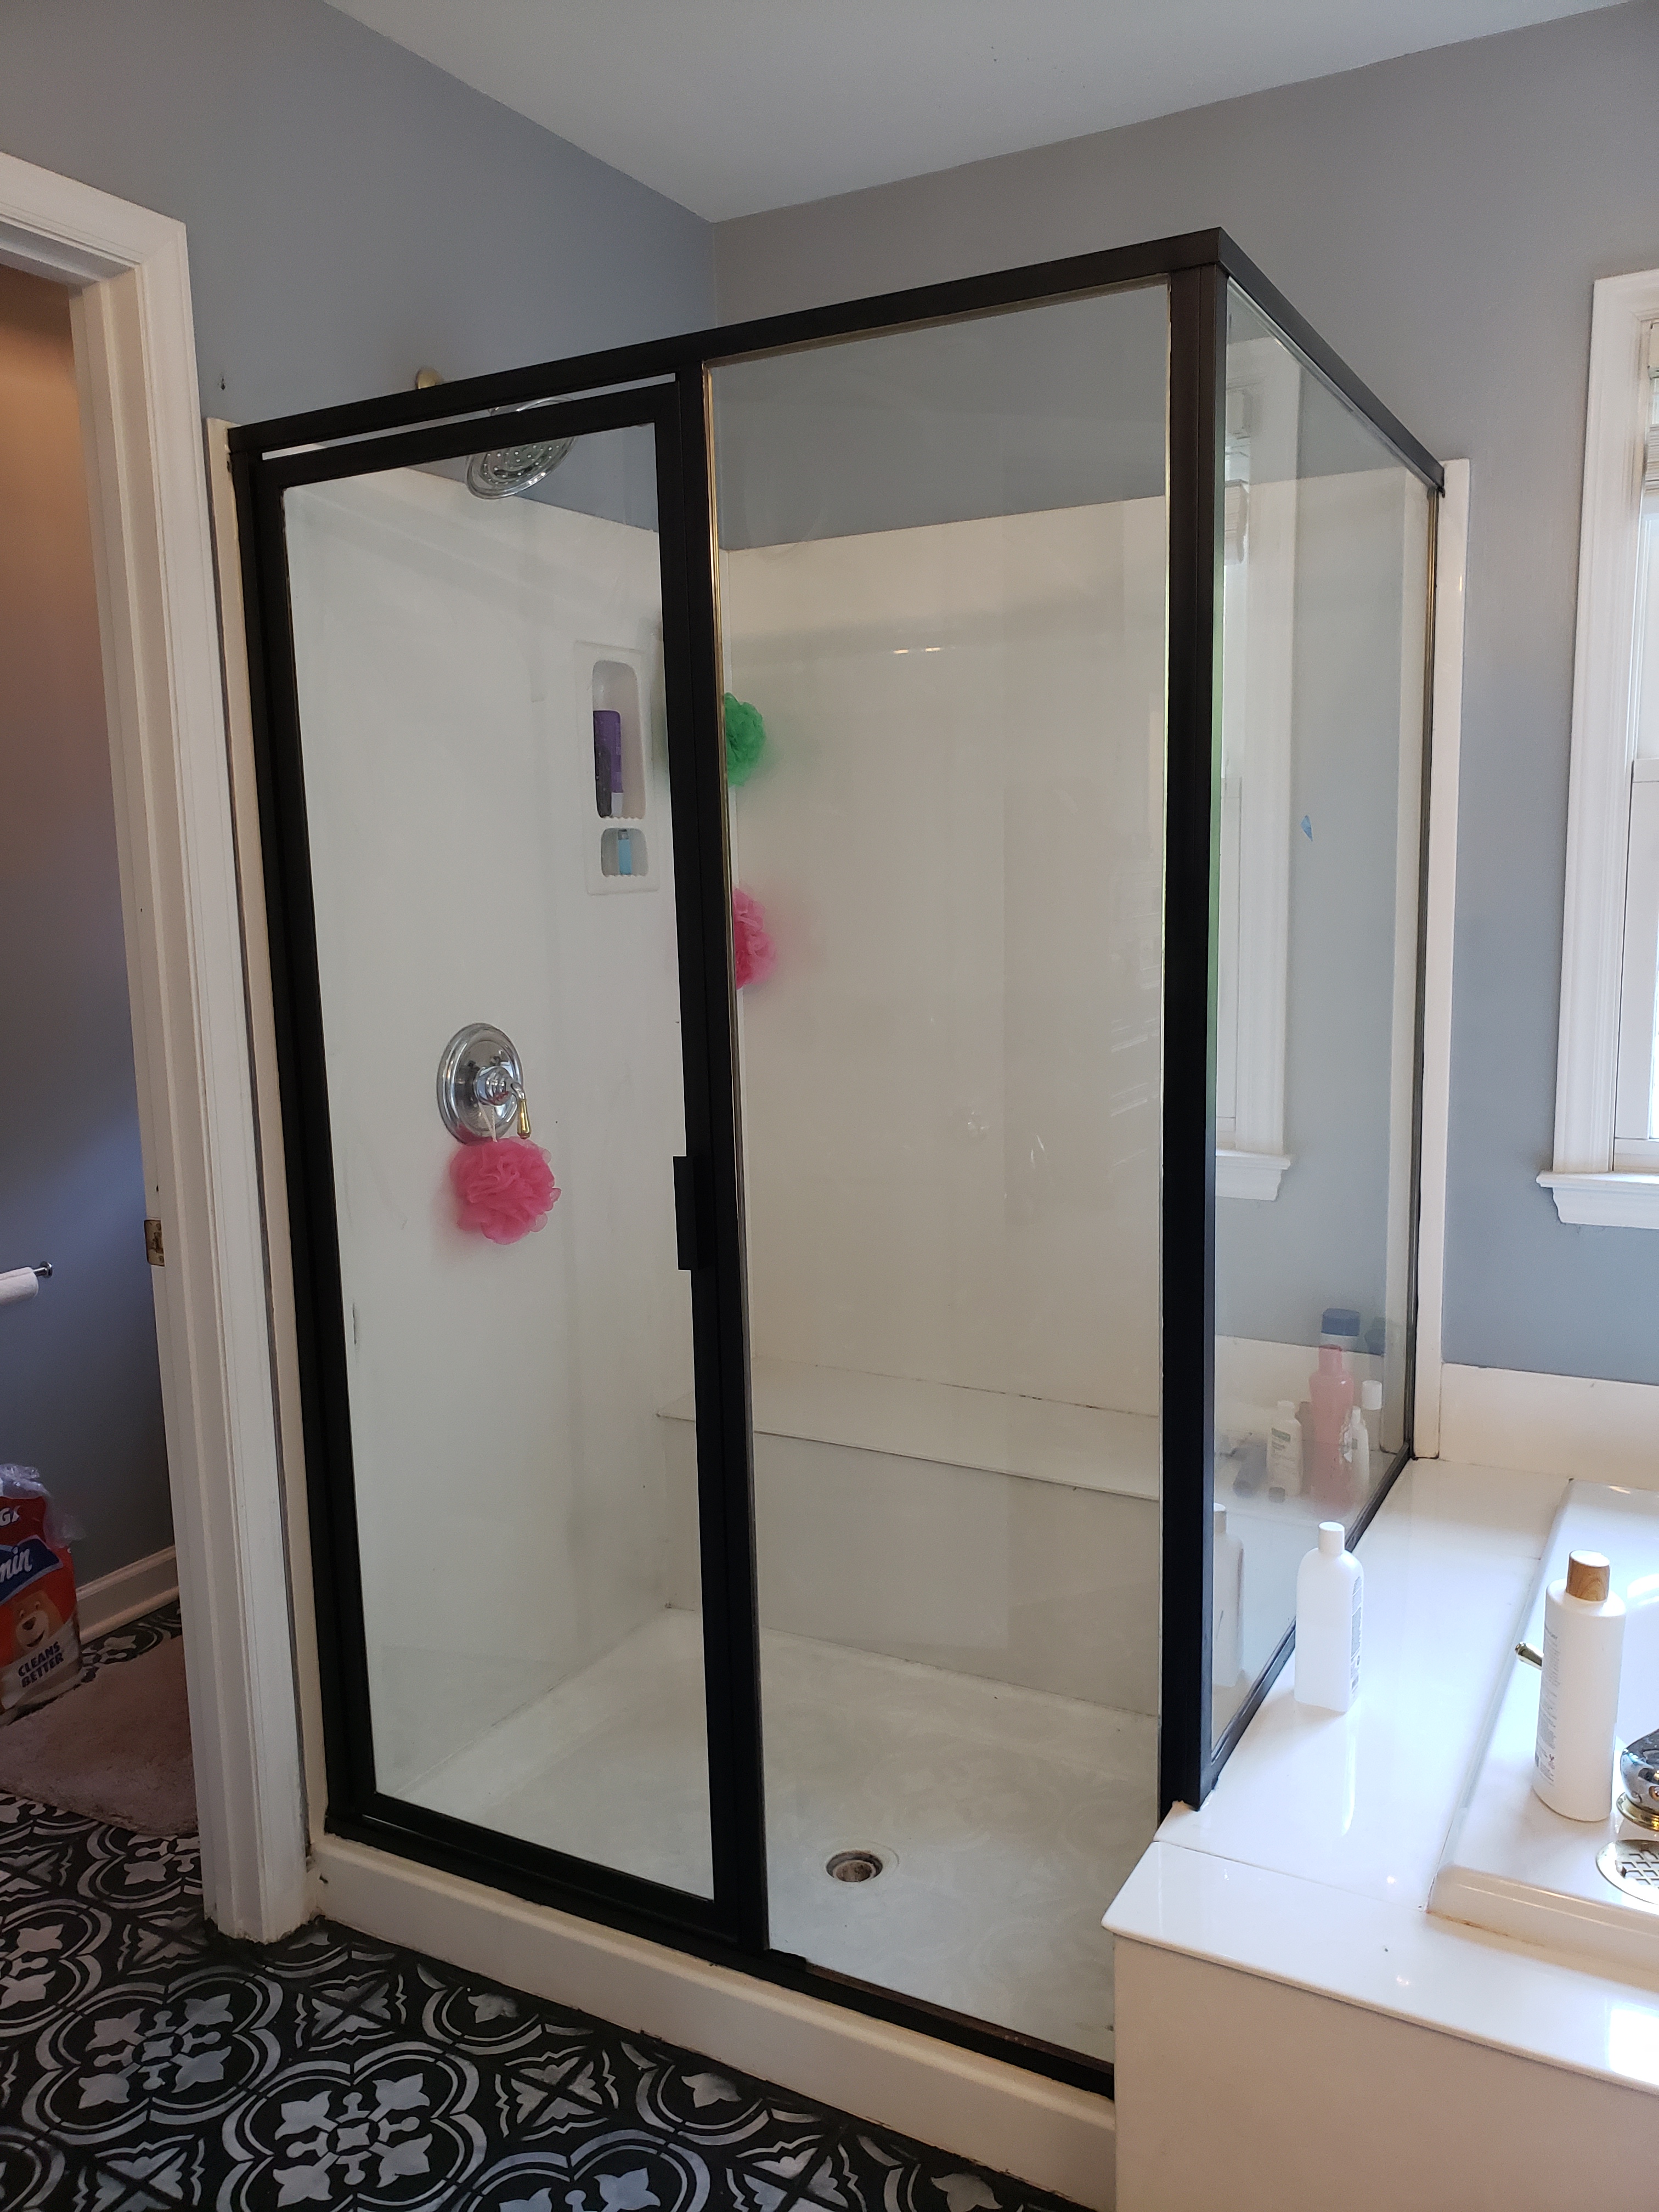
Is a room ever completely done ? I feel like the answer is always no. There will always be something you want to change or adjust to continue making it feel like your own. In my case it was our shower frame that needed to be changed. We loved how the bathroom turned out but that gold just wasn’t working in there anymore. One dat my husband said why don’t you paint the shower frame so I stopped procrastinating and went to work the next day. Alas, the project is complete and here is how I did it.


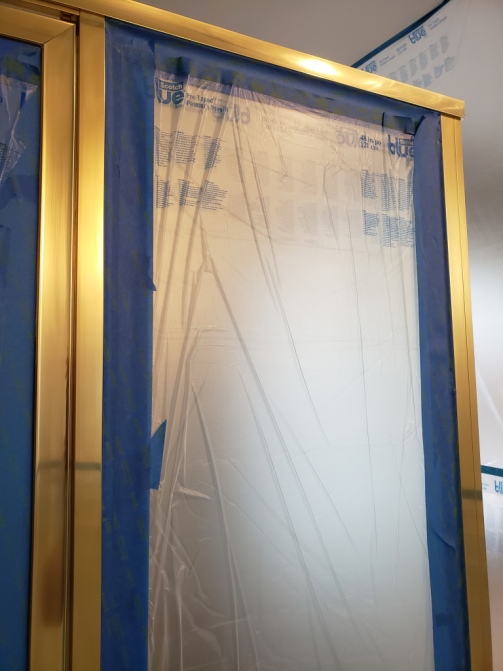
Prep, prep, prep. You will hear every DIYer tell you that prep is key to a good DIY job. I spent what felt like days taping but once it came time to actually spray paint it made it worth it. I first started by placing tape along where the glass and gold frame meet and I overlapped it slightly because there is a piece of rubber that seals the glass in and it creates a tiny channel that you can run a sharp knife along it to get a clean cut. You’ll need to tape the entire frame on the inside and outside of your shower frame. After you have completed the taping then you neeed to cover the glass with plastic sheets and tape that down as well. As you spray paint the plastic will blow up from the air so it needs to be sealed all the way around. I created a small painting room by taping sheets of plastic t the ceiling and letting it hang down. Now this worked but I wish I had encompassed our bathroom windows in my plastic spray room to allow more ventilation.


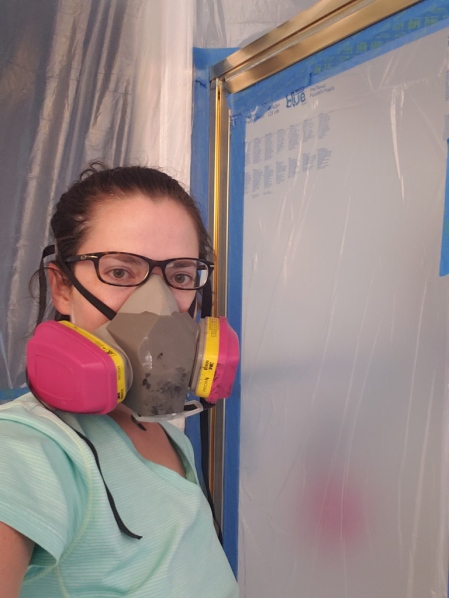
Once you have completed taping and covering all floor surfaces it is time to spray paint. I highly recommend wearing a face mask for spray painting, epecially indoors. This is the one I use and have had for 9 years now and works fantastic. First use a car primer that is made for metal surfaces. You can purchase these in the spray paint aisle and it will specifically say for cars. I did 2 coats of car primer on all my metal surfaces. After that has dried you can use whatever spray paint color you like but make sure it is made for metal, as well. The color I went with was farmhouse black and apparently is quite popular because we had to go to multiple store to be able to get enough. I needed 4 cans of spray paint to cover both the inside and outside of my shower frame. 

Spray paint room
Not only is this an awesome respirator but it’s also super attractive !


After you’re done spraying you can peel off your tape. I like to peel at a 45* angle. Now inevitably you’ll probably have a few spots that spray paint got through your plastic and it is easy to clean off. Get some pure acetone, which can be purchased at Target, Walmart or any pharmacy and just put some on a cotton ball and wipe away whatever paint got onto your surface. And then your done ! 
Total this took about 2 days and only because I got sick of taping and wanted a break from that- 6 hours of taping for 15 min worth of spray painting but worth it!

What a difference a few hours of work and 20 minutes can do !

Filed in: DIY • by ford.amanda.m •

Mudroom Coat Wall

March 10, 2019

So, I know there are a million tutorials out there for a board and batten mudroom wall but I thought I’d still post my how to. This was my first real DIY project that would be semi permanent and I couldn’t just take it off the wall because it didn’t turn out well. I am planner, type A personality and it needed to be as perfect as possible. I made multiple sketches trying to decide what exactly I/we needed in the mudroom/laundry room. After lots of drawings and pinteresting (that’s a word, right ?) I had finally decided what to do and how it would look.

2019-02-09 16.44.25

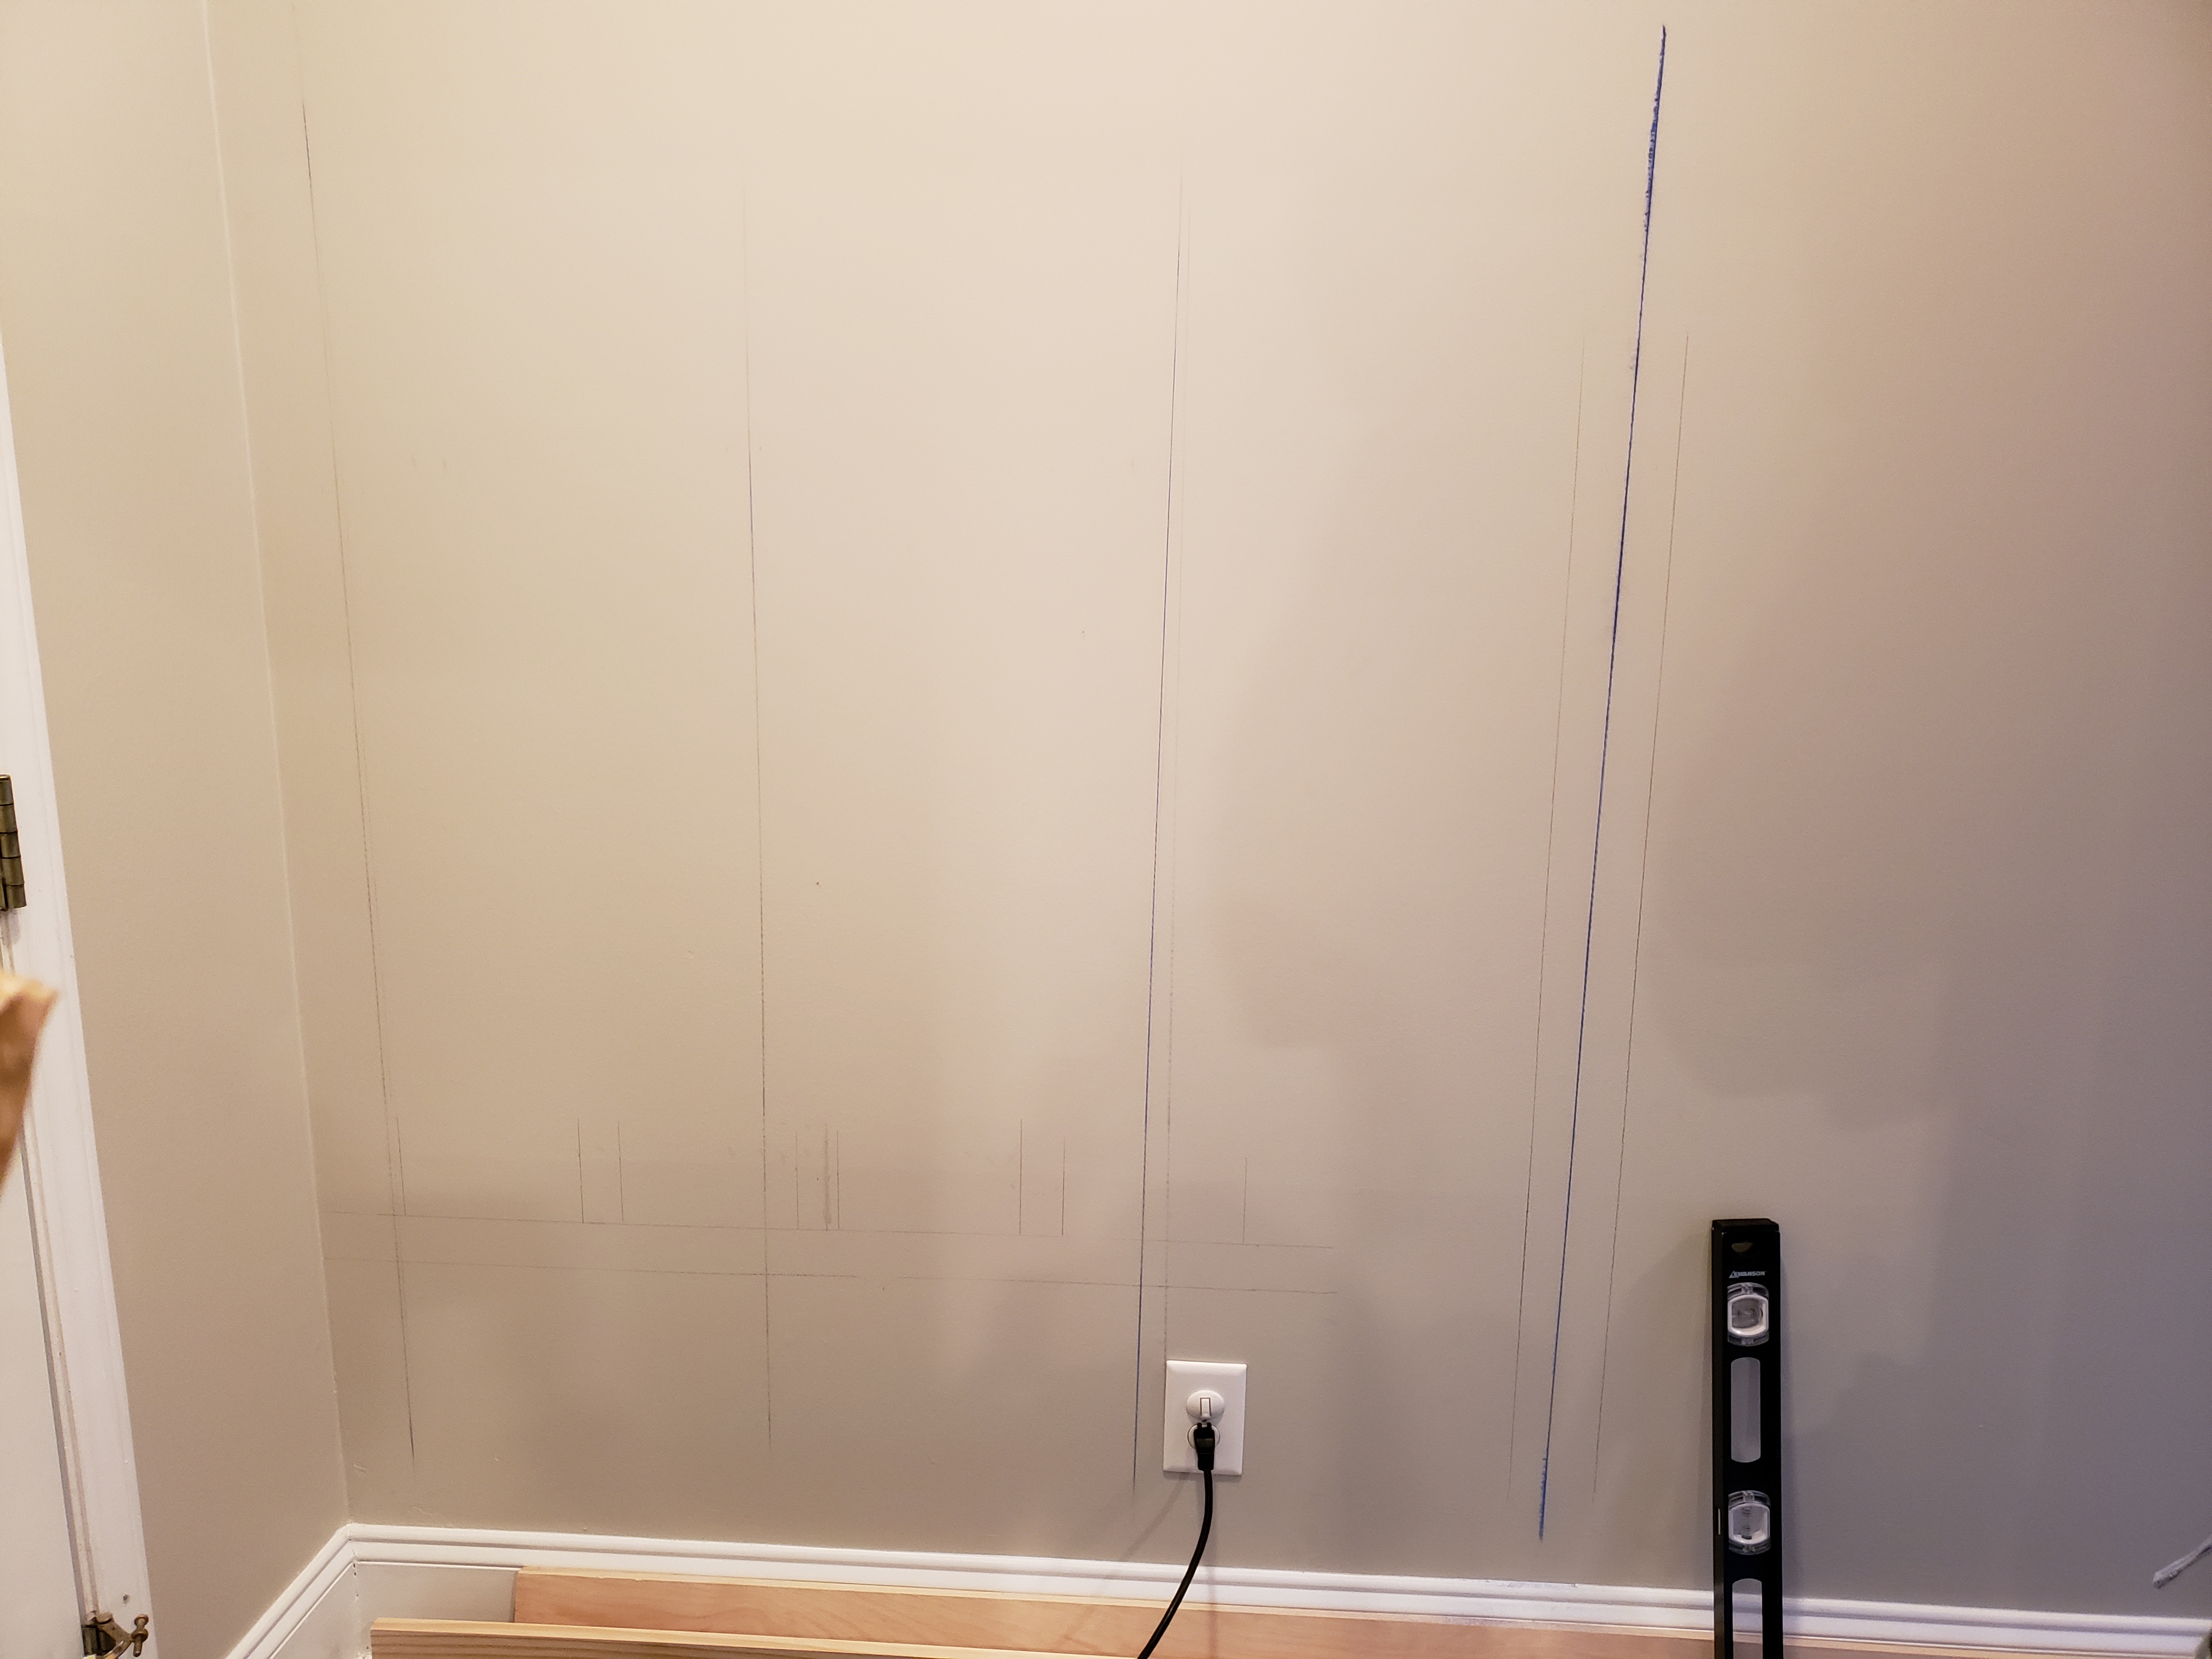
First I made a chalk line on each of the studs since that was were my vertical pieces would be going.  If you have a wall outlet like I do then that is an easy starting point since an outlet is always attached on the side of a wall stud. From there I used my stud finder to find the other 3 and then measured that they were 16 inches apart. Then I had to decide how tall I wanted the coat hooks to be. It wasn’t by any science or math. I grabbed a coat and held it up and decided it was a manageable height for myself and my husband. I then had my 6 year old do the same for the lower hooks since they would be using these for their backpacks and their coats. Now came the fun part…buying the supplies !

Here’s what you’ll need:

  • 3- 4x6x1
  • 1- 6x6x1
  • 4- 3x6x1
  • 1- 2x6x1
  • 1- 2x6x2
  • miter saw
  • nail gun
  • nails
  • liquid nails
  • caulk
  • wood filler
  • level

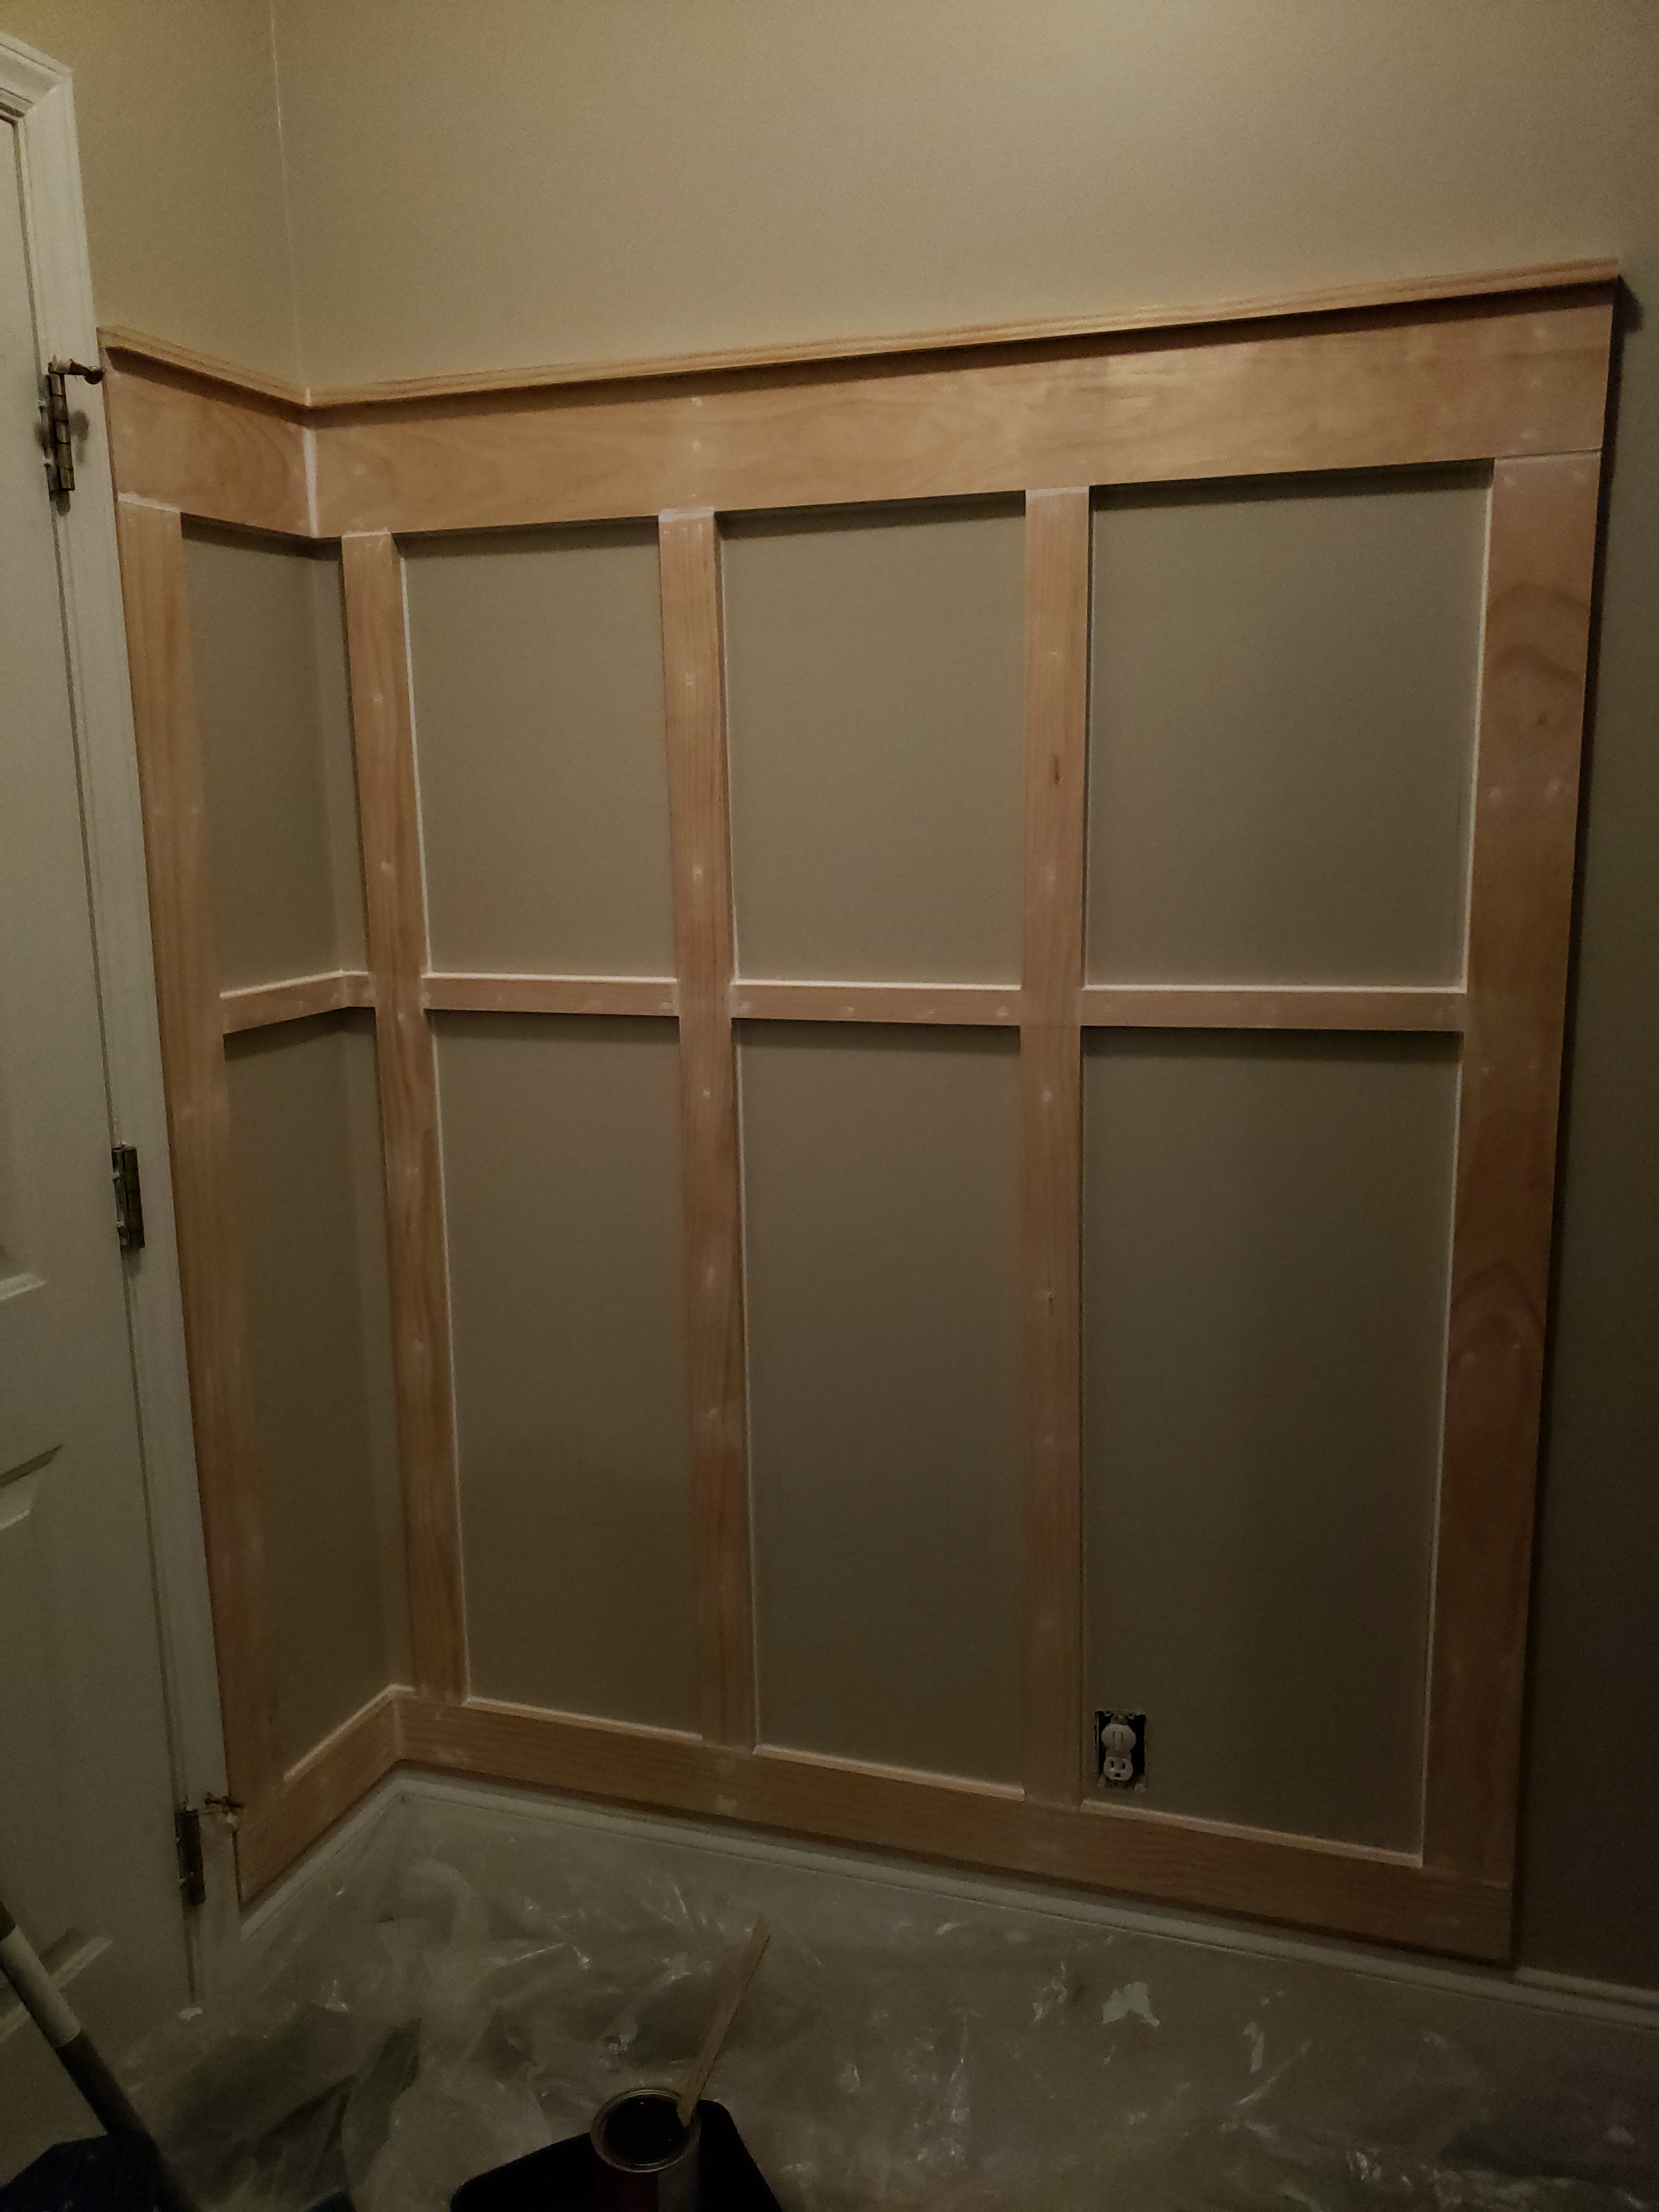
First I measured the length for the bottom piece, cut it and then put liquid nails on the back of the board using my 2x6x1 for a spacer and support on the bottom I nailed it to the wall. I used my chalk lines as a reference for where the studs were and placed 2 nails along each stud. Next, I measured my 6x6x1 for the top of the frame and made sure that it would be level with the bottom piece i just placed. Then same process I put a long zigzag bead of liquid nails along the back, made sure it was level, placed on the wall and nailed it where each stud was. Next I did the left and right vertical pieces. Once all my edge pieces were done it was time to do the vertical pieces on each stud. I measured each vertical piece individually and still did a long bead of liquid nails just for extra support before nailing them in. Once all your vertical pieces are  in place then it’s time to do the horizontal spacers that will also be used as your second row of hooks. Again, measure each one individually before cutting. Since there would be no stud behind these pieces to nail into I made sure it got a good amount of glue without spilling out the sides because well kids can be destructive and I’d like this to last. Once I was all finished framing it out it didn’t quite look complete so that’s when I went out and bought a 2x6x2 for a decorative finished look to the top. I cut it to length and nailed it every 8-10 inches on top of my 6x6x1 and it made it look so much better!

2019-02-12 20.46.50

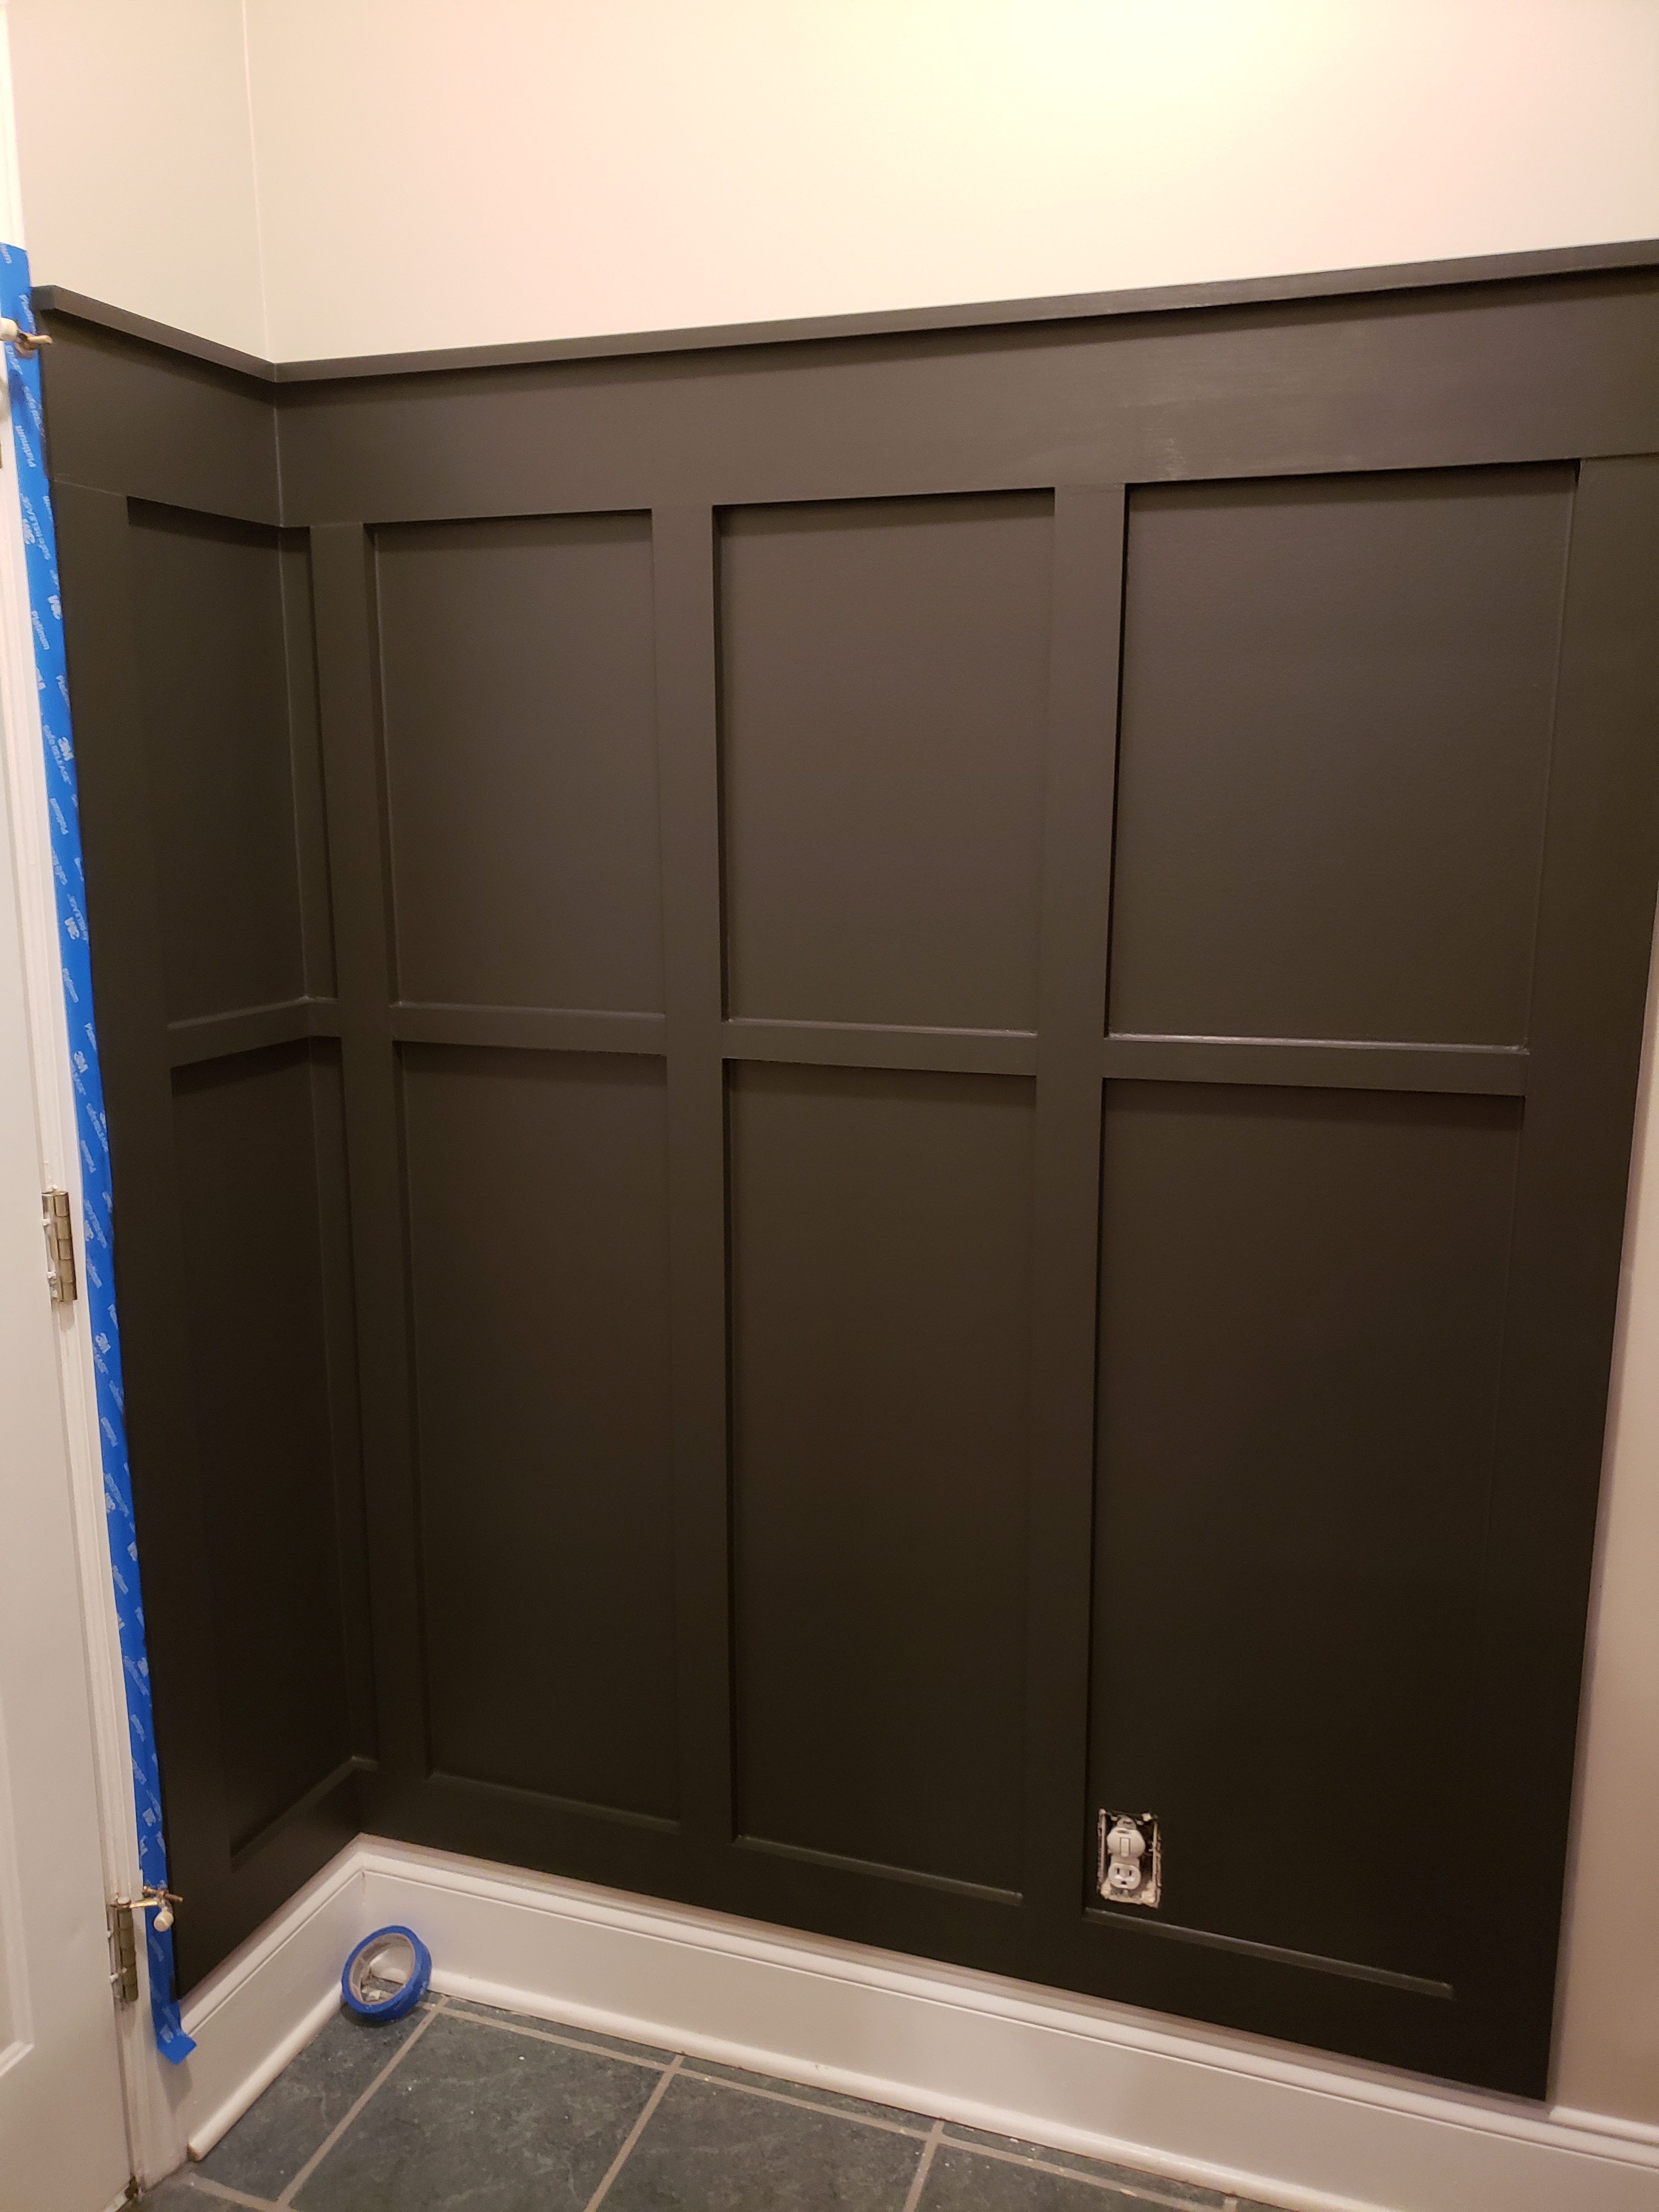
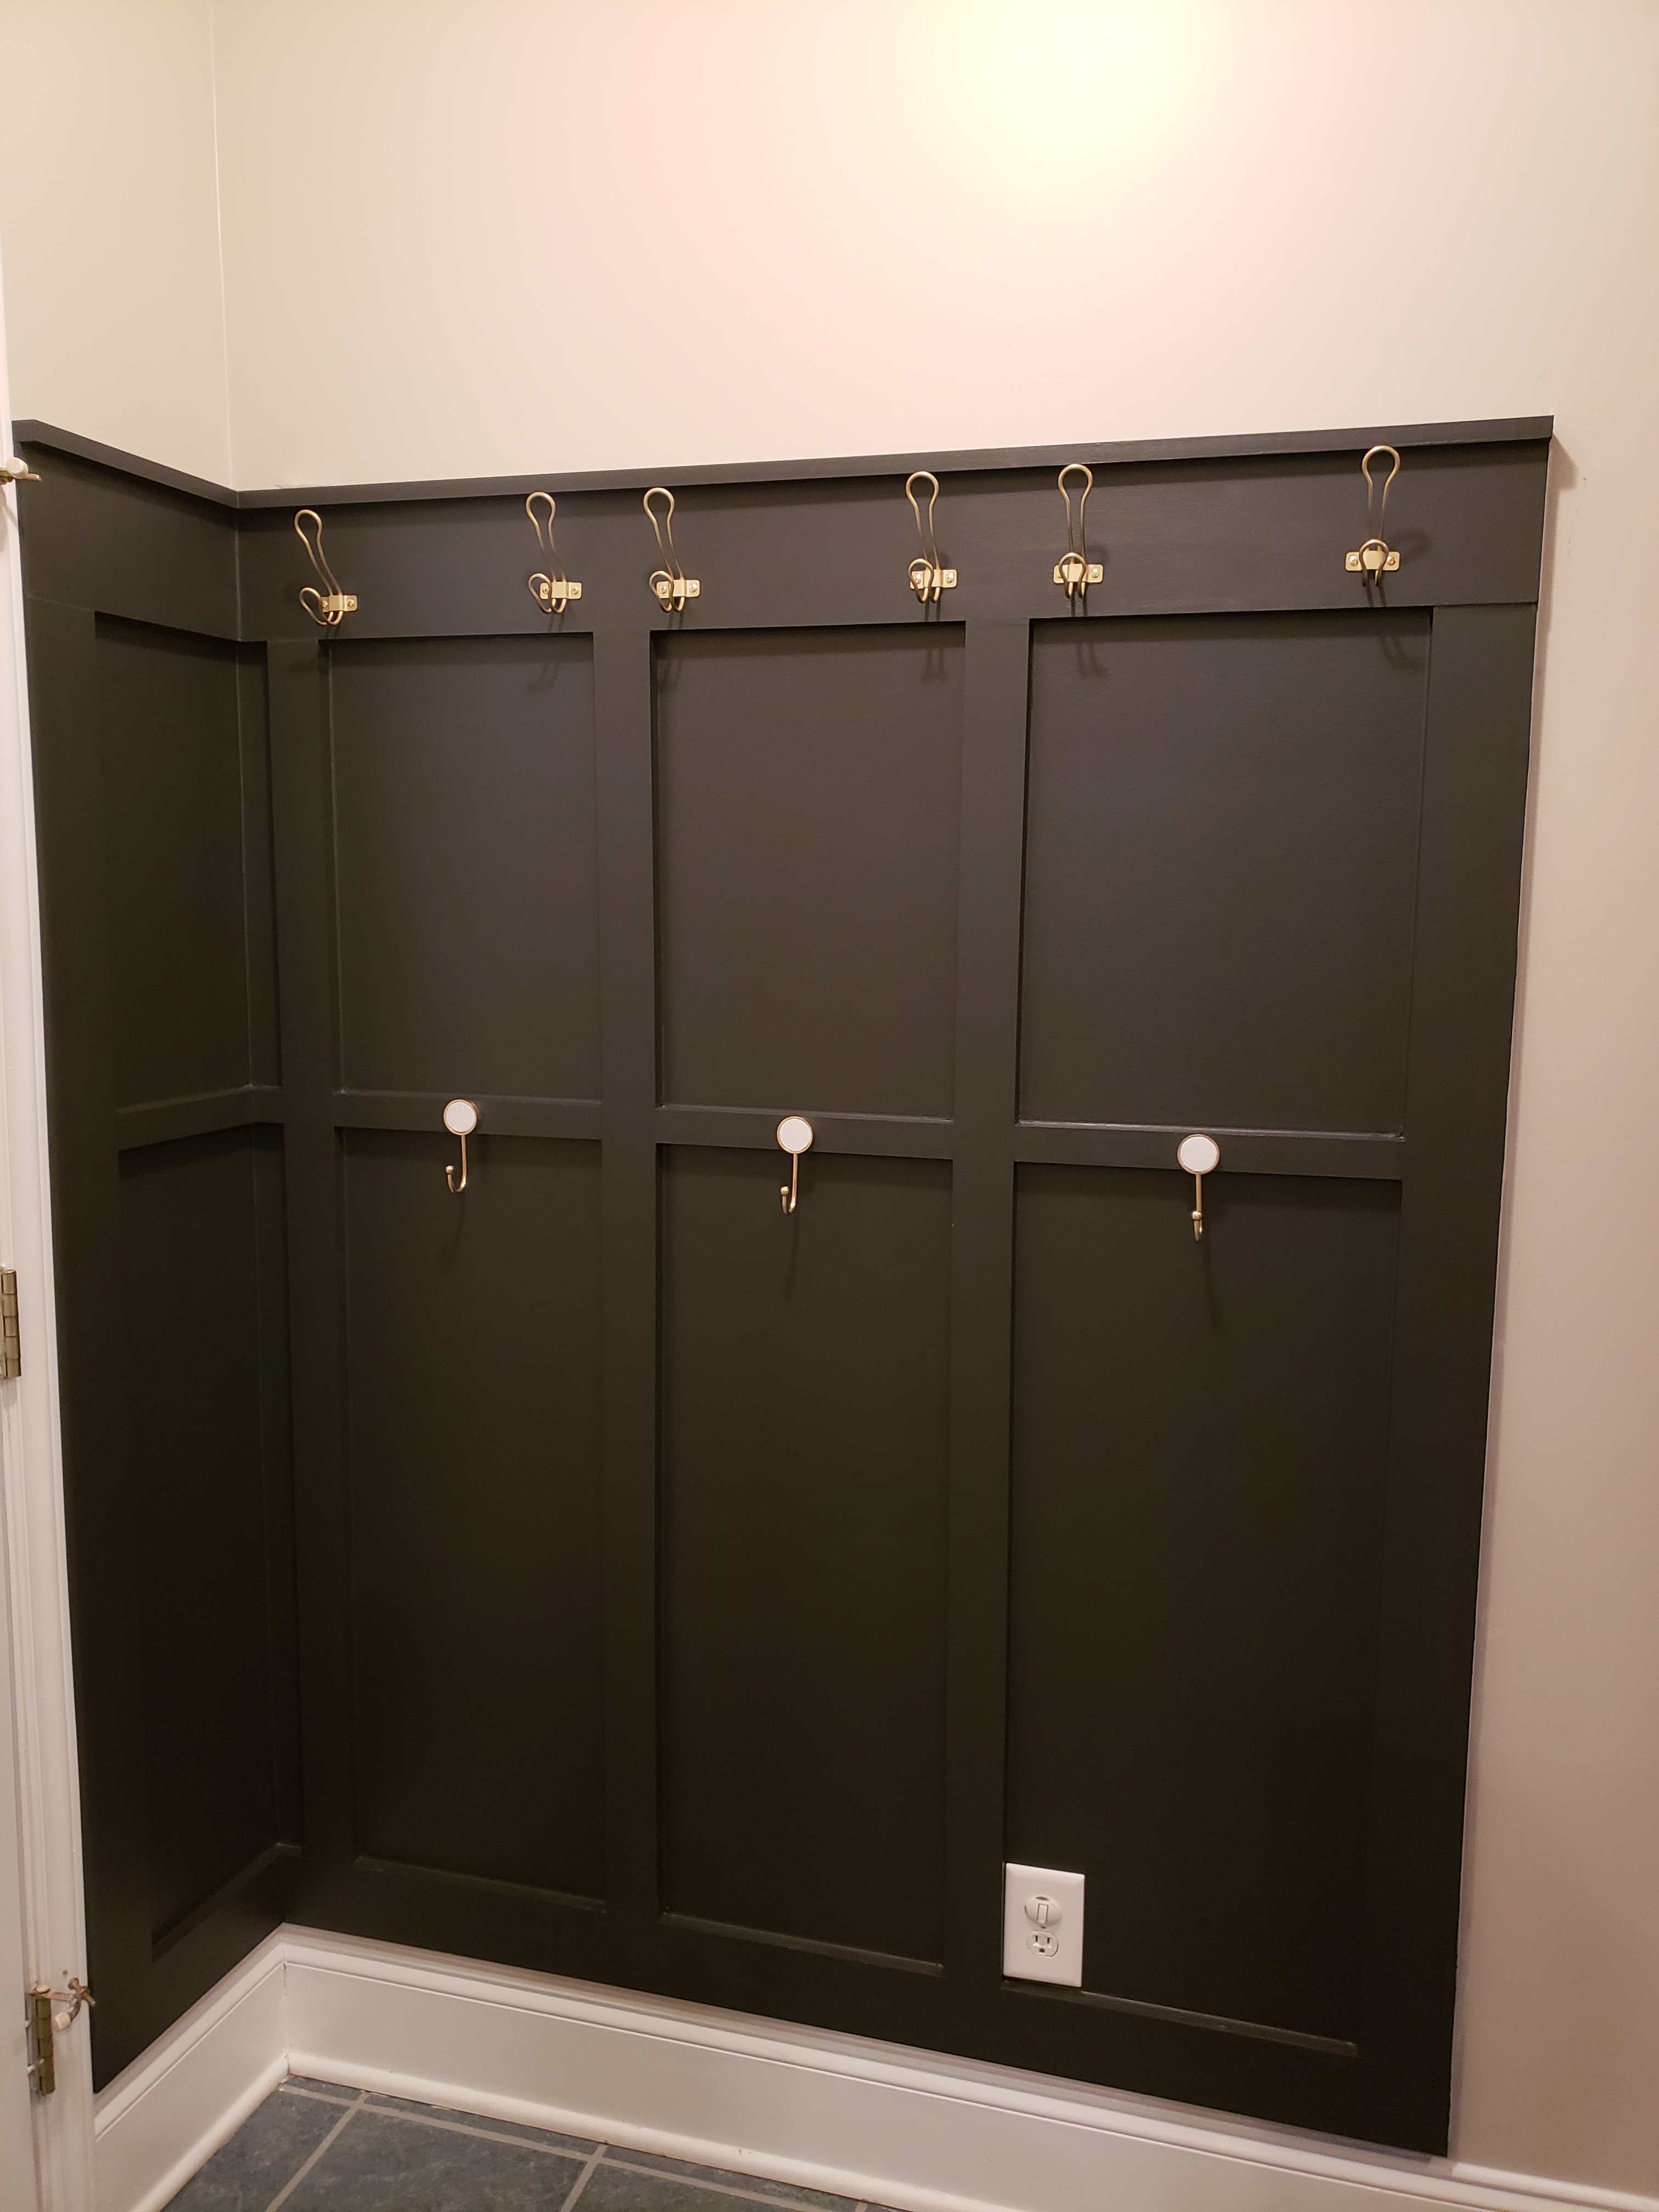
Once all your wood is on the wall it’s time to caulk and fill in the nail holes. I love using this handy tool for getting a perfectly smooth finish along each seam. I cut my tip where it shows 1/4 of an inch on the caulking tube and using a caulk gun I placed a bead along the inside seams where the wood and wall met, then scrape off the remainder to get a smooth finish. You’ll have some caulk come off each time and I usually put it in a paper bathroom cup just in case later I need to fill anywhere in and I can use the leftover in the cup. Also, keep a damp towel with you so you can clean your tool each time. After the inside was complete I also caulked the top and right side (didn’t need to do the left because it bumped up to my door frame). After all your caulking is complete then it’s time to use your wood filler to fill in all the nail holes and to smooth out any areas where wood touches wood that might not be perfect. Be sure to scrape off the excess wood filler before letting it dry. After it’s dry, sand over the wood filler to give it a smooth finish. I took a very damp washcloth and wiped down the entire wall so it would be free of dust before I painted and vacuumed the entire area. The last thing you want is dust while your painting your hard work.  Last step-PAINT and Hooks !! I painted it Sherwin Williams Iron Ore and finished it with  brass coat hooks from home depot and these from target. I absolutely LOVE LOVE LOVE the way it turned out.

2019-02-14 17.37.582019-02-14 22.17.21

It took me a few days to finish this project because well 3 little kids and a full-time job but you can definitely get this done in 1 day (minus the hanging of the hooks). I did it all by myself exect for the couple of times I needed my husband to hand me the nail gun or hold up the wood for a moment while I nail. So, if you plan to do this alone at least have a helping hand that you can yell at from across the house :).

A couple of tips I have is if you plan to put one of your pieces up against the door frame then rip away the caulk from the area that your piece of wood will go up against that way you don’t have a slight gap and your wood can rest snug up against the door frame. The other is buy some shims or make some from your spare pieces of wood. Not all walls are straight and level. Mine had a slight curve in so when I put my vertical piece up against my horizontal piece my vertical sunk in slightly….so, I made myself a little shim so it would be level with the horizantal piece. Since you plan on caulking you’ll never see it.

For my first Diy project in this house I’m super happy the way it turned out. It wasn’t that hard to do just a bunch of little steps. My husband loved it so much that he wants to do our ENTIRE master bedroom….uhhh not sure if ready for all that but we shall see!

Filed in: DIY • by ford.amanda.m •

DIY on a budget! Learning and teaching DIY and giving you the confidence to tackle any project.
~Follow along @moscatoandflowers~

Search The Blog

Categories

  • Baking
  • Celebration
  • Design
  • DIY
  • Travel
  • Uncategorized

Popular Posts

Mood Board: Cozy Living Room

Disclaimer- this post contains affiliate links, which means I receive a small commission for certain items purchased through links. Having a mood board help put all your ideas swirling around in your head to a true vision. It also helps to see what a can become or how every piece will come together. I truly […]

One Day Makeover

Disclaimer- this post contains affiliate links, which means I receive a small commission for certain items purchased through links. When I was asked to do a makeover for a friends primary bedroom I started researching immediately all the things i could do in the room to maximize the space. People think because they have a […]

Pinterest

Follow

@moscatoandflowers

Recent Posts

  • Mood Board: Cozy Living Room
  • One Day Makeover
  • One Room Challenge-Week 1
  • It’s The Most Wonderful Time Of The Year
  • New England Travel

Recent Comments

No comments to show.

Archives

  • August 2022
  • April 2022
  • October 2021
  • September 2021
  • August 2021
  • December 2020
  • September 2020
  • October 2019
  • September 2019
  • August 2019
  • April 2019
  • March 2019
  • February 2019
  • January 2019
  • September 2018
  • August 2018
  • July 2018

Categories

  • Baking
  • Celebration
  • Design
  • DIY
  • Travel
  • Uncategorized

Copyright © 2025 · Moscato and Flowers LLC | Theme by Blog Pixie

Copyright © 2025 · Coffee & Sundays Theme on Genesis Framework · WordPress · Log in